You’re comfortably seated on your sofa, eagerly anticipating watching your favorite program on your Sharp TV. All of a sudden, the screen turns pitch black, leaving you bewildered and annoyed. The audio is still working, but the video has vanished into thin air. Don’t worry! This problem, often referred to as the “Black Screen of Death,” is a frequent issue that many Sharp TV users encounter.
It’s a baffling situation that makes you question what happened and how to resolve it. You might be inclined to bring in the professionals, but before you do, remember that there are several easy DIY solutions you can attempt to fix the issue yourself.
This article will explore the most efficient ways to get rid of the Sharp TV black screen problem. We’ll discuss a variety of solutions, giving you the knowledge and resources to handle this irritating problem.
What Causes Sharp TV Black Screen
The Sharp Roku TV black screen problem can be caused by software issues, damaged cables, inconsistent power, or faulty device components.
How to Fix Sharp TV Black Screen Issue
Restart or Power Cycle Your TV

Before trying other solutions, start by restarting your device when the TV screen goes black or becomes unresponsive.
- Unplug your TV’s power cable from the electrical outlet.
- Wait for 10 to 15 seconds.
- Plug the TV back into the outlet.
Power cycling refreshes the TV system and eliminates any bugs or glitches that might be causing the black screen issue. You’ll notice that the system becomes faster and more efficient after a power cycle. If you’ve observed your TV becoming slow, a power cycle can help.
Alternatively, you can restart the TV using the remote control by pressing the correct button sequence:
- Press the Home button on the remote five times.
- Press the Up button once.
- Press the Rewind button twice.
- Finally, press the Fast Forward button twice.
This process typically takes between 30 and 60 seconds. After completing the sequence, your Sharp TV should restart. If it doesn’t restart on the first attempt, repeat the process.
Check Your Remote Control
If your Sharp TV is working correctly but the screen still goes black, the issue might lie with your remote control.
So, test your remote on other devices, such as a DVD player or cable box, to see if it functions properly with them. If the remote works fine with other devices, the issue likely lies with your TV and not the remote.
So, just replace the batteries in your remote with fresh ones. And also, operate your TV manually using the buttons on the TV itself. If the TV functions normally without the remote, then the remote is likely the issue.
If you’ve determined that the remote is at fault, don’t worry! You have two options: either repair the remote or purchase a new one. Repairing the remote may be a cost-effective solution if the damage is minor.
However, if the remote is beyond repair or if you prefer a hassle-free solution, buying a new remote control specifically designed for your Sharp TV model would be a better option.
Inspect the Wall Outlet
Sharp TV screen issues can often be traced back to problems with the wall outlet. A malfunctioning wall outlet can damage your TV, resulting in poor display quality or a black screen.
Unplug your Sharp TV from its current wall outlet and plug it into a different one. If the TV works properly in the new location, the original outlet is likely faulty.
Plug another electrical device, such as a hair dryer or electric kettle, into the original wall outlet. If the device functions normally, it indicates that the outlet is providing power correctly.
Use a multimeter to check the voltage output of the wall outlet to check if the outlet is supplying enough power to your Sharp TV. If the voltage reading is lower than expected, the outlet may be the cause of your TV’s black screen issue.
Inspect All Cords and Cables

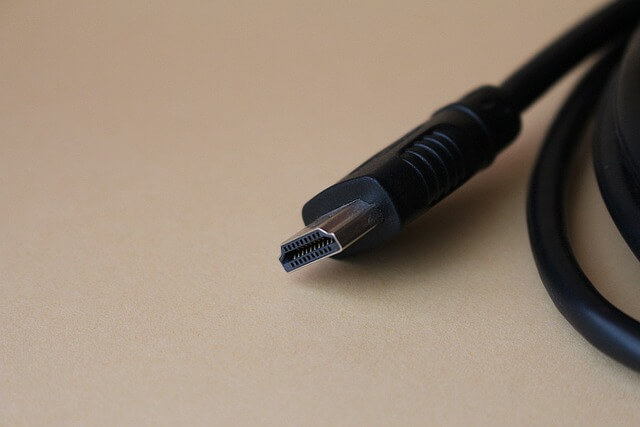
So, closely inspect the HDMI cables for any signs of damage and replace any damaged cables with new, high-quality ones.
If the cables appear to be in good condition, reconnect them securely to your Sharp TV and the corresponding devices, making sure each cable is fully inserted into the correct HDMI port. 
If you’ve been using a particular HDMI port on your TV, try connecting the cable to a different port to determine if the issue is related to a specific port or the cable itself.
After reconnecting the cables, turn on your Sharp TV and the connected devices to see if the black screen issue has been resolved.
Perform a Factory Reset
If you’re experiencing persistent glitches or bugs that affect your Sharp TV’s performance, performing a factory reset can help. A hard reset clears your TV’s cache, preferences, custom settings, and more, letting you start fresh.
To perform a hard reset, locate the reset button on your Sharp TV, which is usually found on the back of the device. Press and hold the reset button for a few seconds until the TV screen turns off and then back on. If the reset button is a pinhole, use a pointed tool like a toothpick to press it.
If your Sharp TV doesn’t have a dedicated reset button, the power button often serves as the reset button. If the screen is visible for a short time before turning black, you can reset the device through the system options:
- Navigate to the Home Screen and select the Settings option.
- Choose the System option, then select Advanced system settings.
- Find and select Factory Reset.
- Enter the special code displayed at the bottom of your TV screen.
- Confirm by tapping OK to initiate the factory reset process.
- After completing the hard reset, your Sharp TV will be restored to its default settings, which should resolve any glitches or bugs causing the black screen issue.
Check for Software Updates
One critical step that many users overlook is checking for system updates, which can lead to serious issues like black screens. To avoid these problems, make sure to regularly check for and install updates on your Sharp TV.
- Navigate to your Sharp TV’s Home screen and select the Settings icon.
- Go to the System menu and choose System Update.
- Select Check Now to manually scan for any available updates.
- If the system detects any updates, proceed to install them.
Adjust Dimming Settings on Your TV
If you’ve accidentally enabled the auto-dimming feature or chosen the wrong settings, your Sharp TV’s screen may appear dim or even completely black. The auto-dimming feature, which uses Optical Picture Control (OPC) technology, adjusts the screen’s brightness based on the ambient light intensity.
- Navigate to your Sharp TV’s Settings menu.
- Select Advanced Settings.
- Locate the OPC option at the top of the menu and set it to “Off“.
- Restart your Sharp TV for the changes to take effect.
In addition to disabling the OPC feature, it’s also a good idea to turn off the Auto-contrast option in the Advanced Settings menu which will ensure that all automatic dimming settings are disabled on your TV, avoiding any further problems.
Contact Sharp TV Customer Support
If you’ve tried all the troubleshooting methods mentioned above and your Sharp TV’s black screen issue persists, there may be an underlying hardware problem, such as a damaged T-Con Board or backlight LED strips.
In this case, it’s best to contact Sharp TV customer support to get personal help from their team. If you recently purchased your TV within the last one or two months, you may be able to replace any faulty components for free under your Sharp TV warranty.
Frequently Asked Questions (FAQ’s)
How to hard reset sharp roku TV with black screen?
To hard reset a Sharp Roku TV with a black screen, hold the reset button (or power button if there’s no reset button) until the TV restarts. If the screen briefly shows, go to Settings > System > Advanced system settings > Factory Reset and follow the prompts.
How can I fix my Sharp Roku TV that has a black screen with a flashing red light?
If your Sharp Roku TV has a black screen with a flashing red light, it may be overheating. Turn off the TV, let it cool for 30 minutes, then check if the red light stops flashing.
How do I fix my Sharp TV that has a black screen with no sound?
If your Sharp TV has a black screen with no sound, unplug it from the power source, wait 60 seconds, then plug it back in and turn it on. If the issue persists, it could be a backlight failure.


