When I bought a Realme TV for my parents, I went with the 32-inch model. At that time, Realme was just entering the TV market, and the price looked like a good deal. The design felt modern, and the performance was decent for daily use.
But after setting it up, I noticed one big problem that quickly turned into a headache. Every time the TV was powered on, it would switch back to the Google TV home screen instead of opening the last input. For me, it was manageable, but since my parents only watch channels from a DTH set-top box and never use streaming apps, this became a real issue. They are not familiar with navigating Android menus and just want to switch on the TV and see their channels directly. In short, I wanted the HDMI input to load by default on boot.
I thought there would be a simple setting to make HDMI the default source on boot, but I couldn’t find anything. Realme promised updates, but even after several software upgrades, the option never appeared. On the other hand, many budget TVs like Redmi or Fire TV already allow you to set your set-top box as the startup input. I later found out that a lot of Realme TV users were also searching for the same fix using terms like Realme TV HDMI mode on power on without remote or set HDMI as default on Android TV.
After many trials and errors, I finally found a method that works. While I tested it on a Realme TV, the same process can also be used on any Android TV that does not have the built-in option to set the set-top box or HDMI input as the default when the TV starts. In this article, I’ll share my experience and guide you through the steps.
How to Set HDMI as Default Input on Realme TV or Any Android TV
Requirements
Before you start, make sure you have the following:
- Projectivy Launcher app – I used the premium version, but you can also try this method with the free version.
- Your Realme TV (or any Android TV) – The method works on any Android TV that doesn’t allow HDMI as the default on boot.
Installation method – You can either install the Projectivy Launcher app directly on your TV from the Play Store, or download the APK file on your phone and send it to the TV using any file-sharing app (just like you normally share apps).
Once you have these ready, you can move on to the steps to set HDMI as the default input source so that your TV powers on directly to HDMI instead of the Android home screen.
Step-by-Step Instructions
Step 1: Power on your TV
- Switch on your Realme TV (or Android TV) using the remote or power button. Wait until the TV is fully booted.
Step 2: Open the Projectivy Launcher
- Make sure you have already installed the Projectivy Launcher on your TV. Open the app from the home screen or the Apps menu.
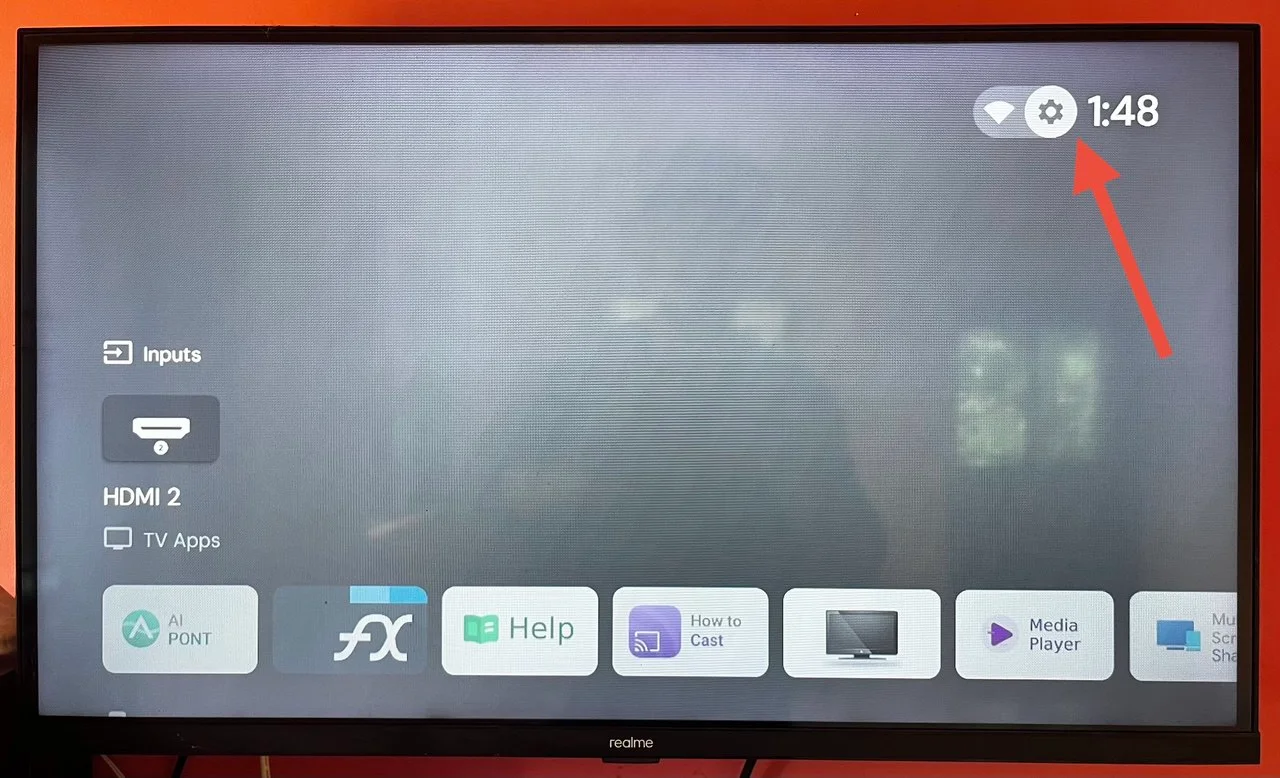
Step 3: Go to Projectivy Settings
- On the Projectivy Launcher home screen, look at the top-right corner. You will see a “Settings” icon (gear symbol).

- Use your TV remote to navigate to this icon.
- Press the OK/Enter button on the remote to open it.
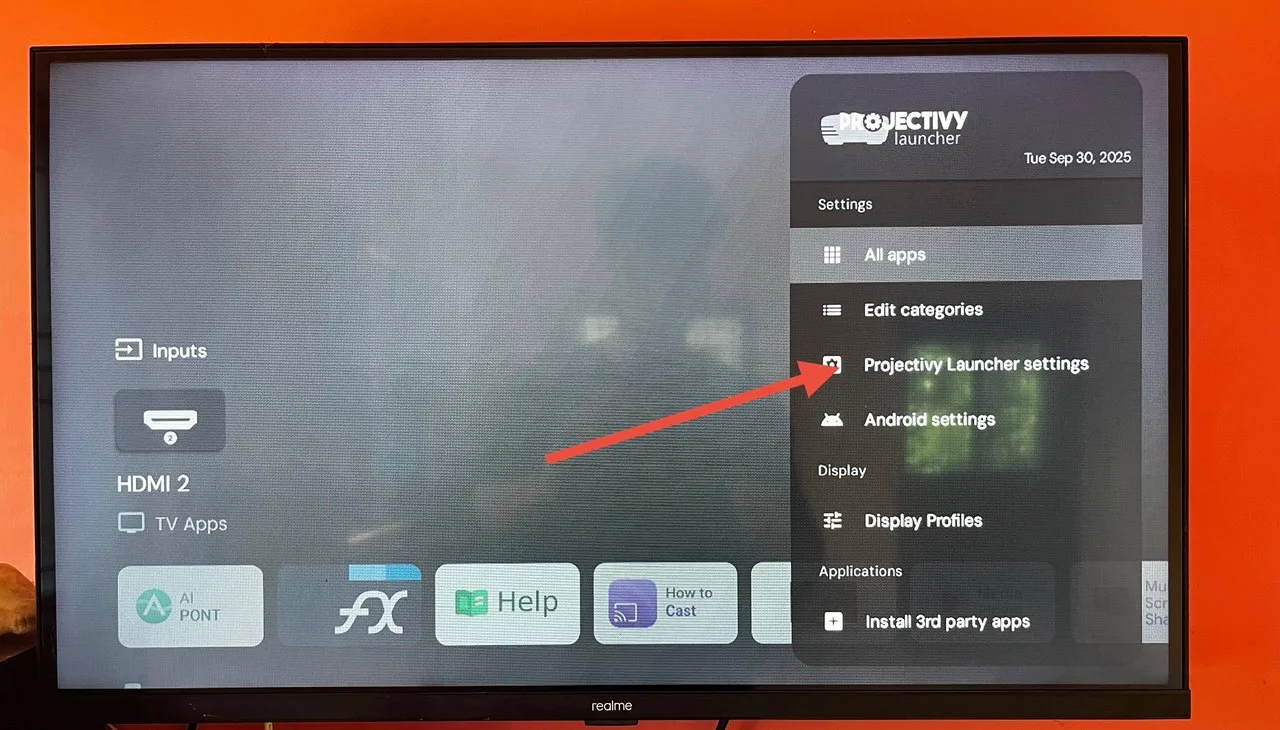
Step 4: Select Projectivy Launcher Settings
- From the menu that appears, choose “Projectivy Launcher Settings.”

- This will open the settings panel where you can customize how the launcher behaves.
Step 5: Enable Override Current Launcher
- Inside the settings panel, go to the “General” section.

- Scroll down and enable the “Override Current Launcher” option

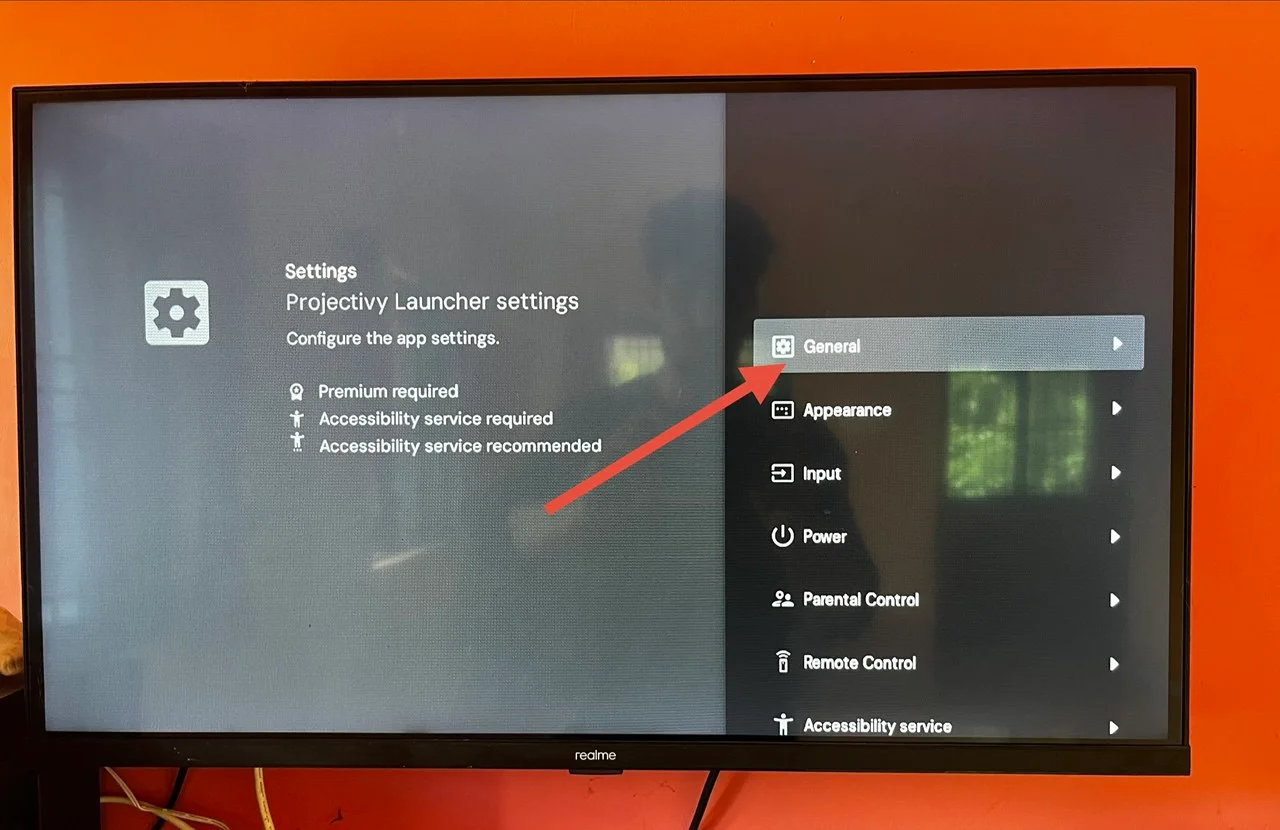
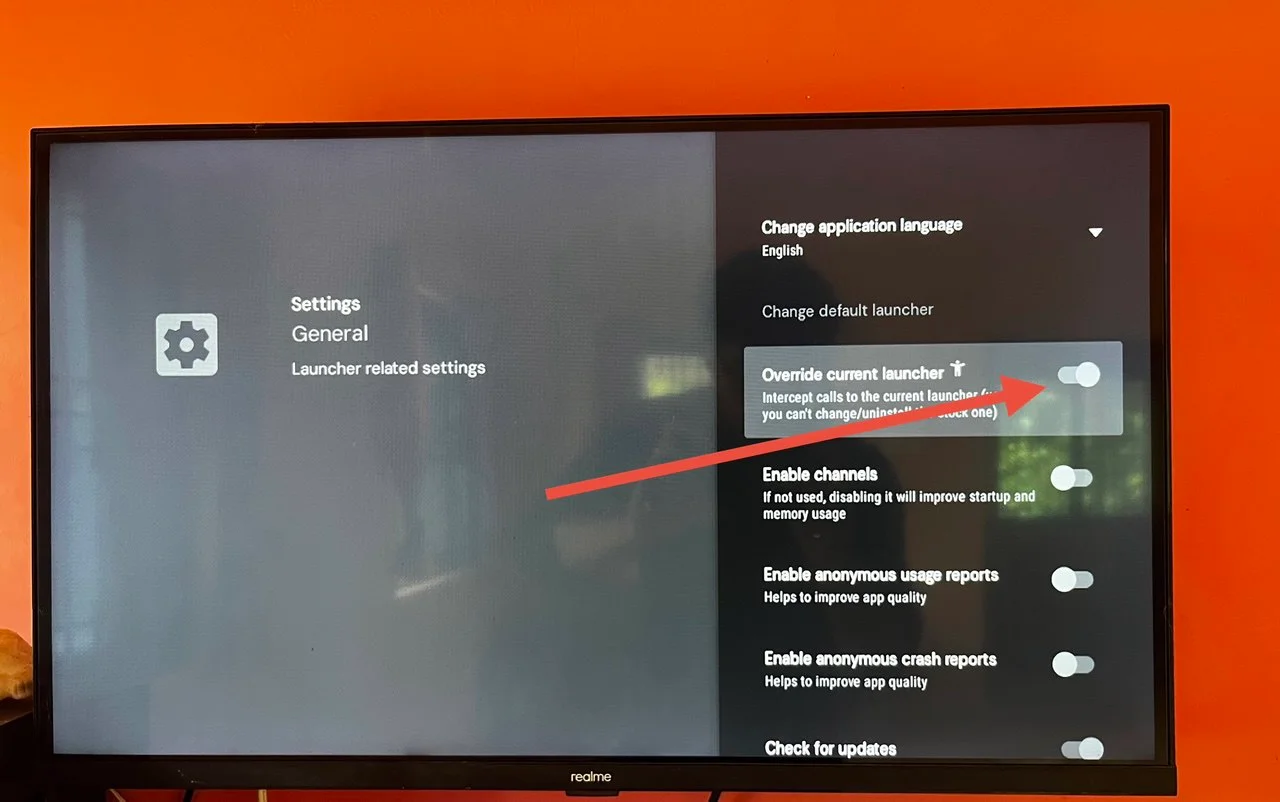
This step is important because it makes Projectivy the default launcher, replacing the Google TV home screen. Without this, the some TV will still open Google Home instead of HDMI.
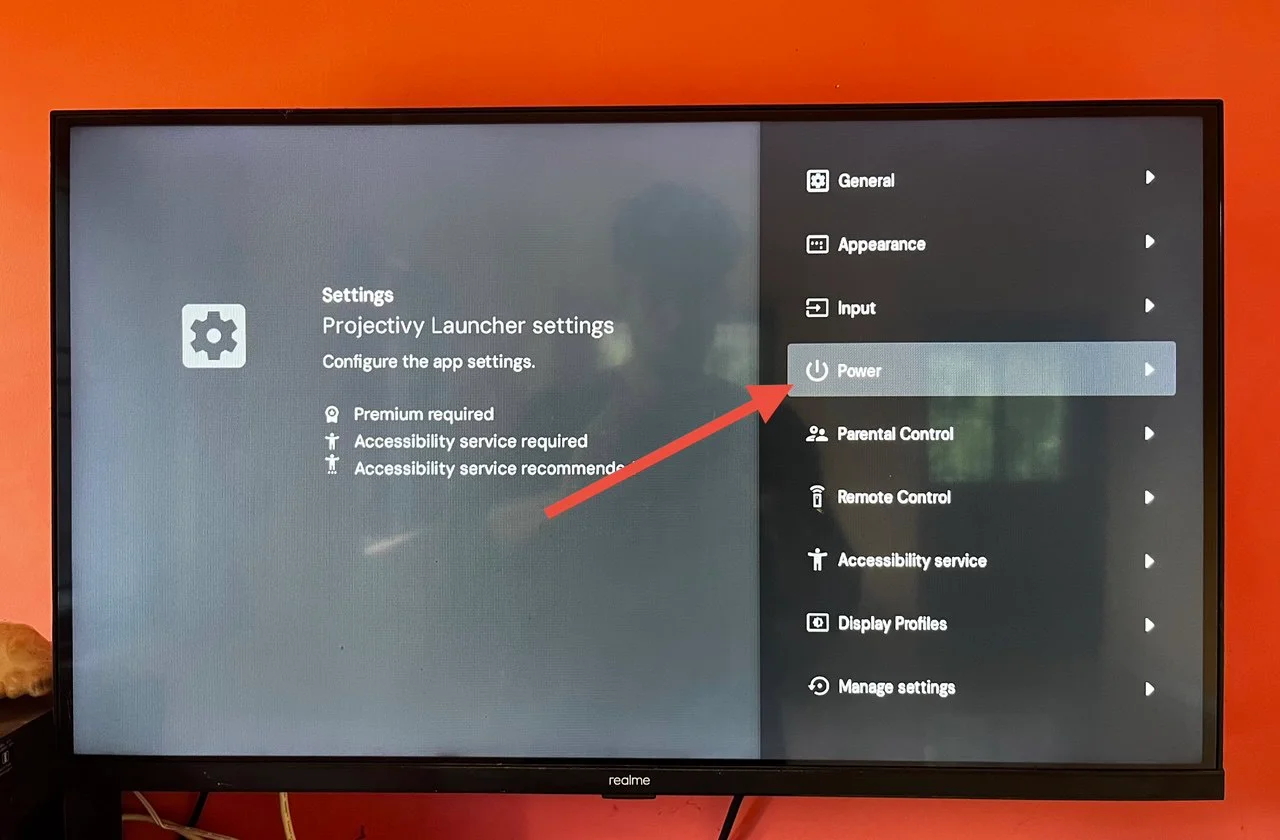
Step 6: Open the Power Settings
- Now go back to the main settings screen inside Projectivy.
- From the menu, select “Power.”

- This section contains options related to startup and boot behavior.
Step 7: Set Autostart on Boot
- Inside the Power settings, select “Autostart on Boot.”

- From the list of inputs, choose the HDMI port where your device is connected.
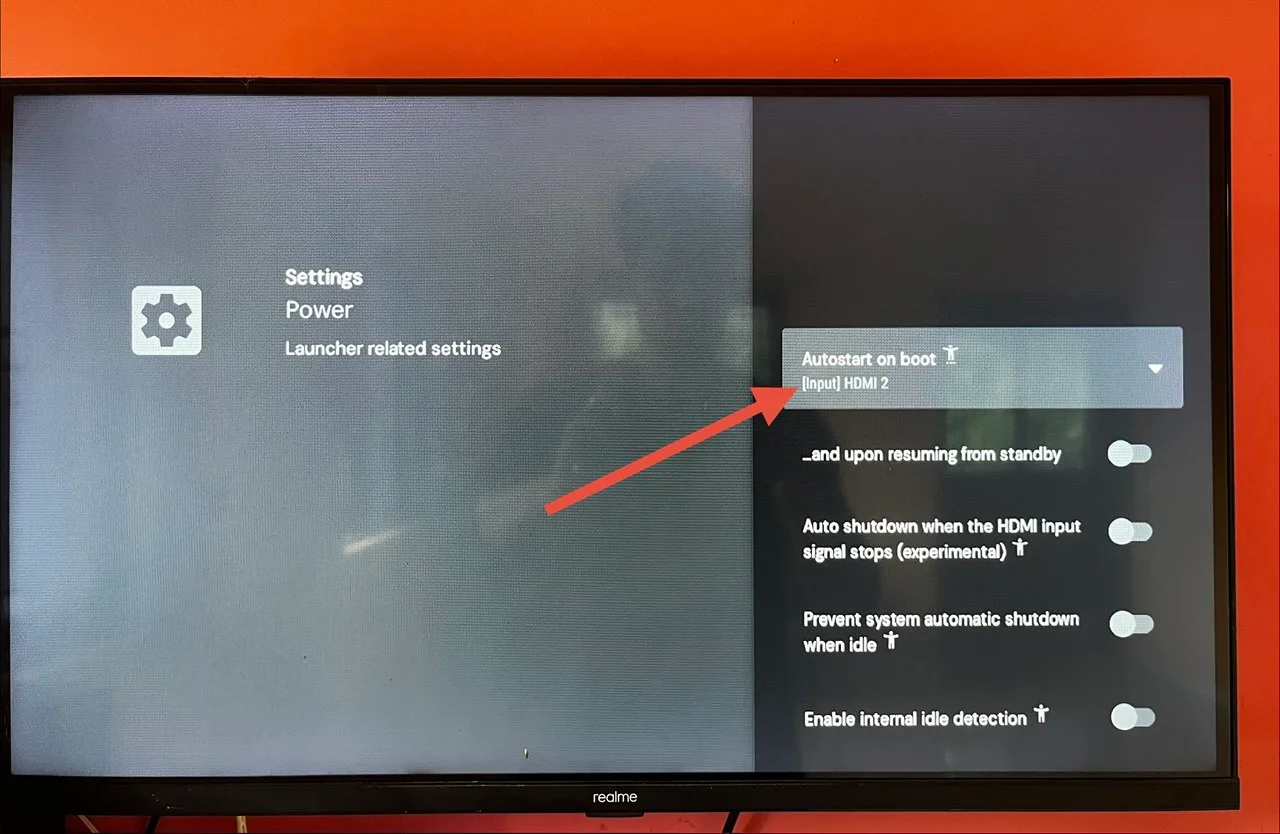
For example, if your DTH set-top box is connected to HDMI2, select HDMI2.
This ensures that every time you turn on the TV, it will directly switch to that HDMI input.
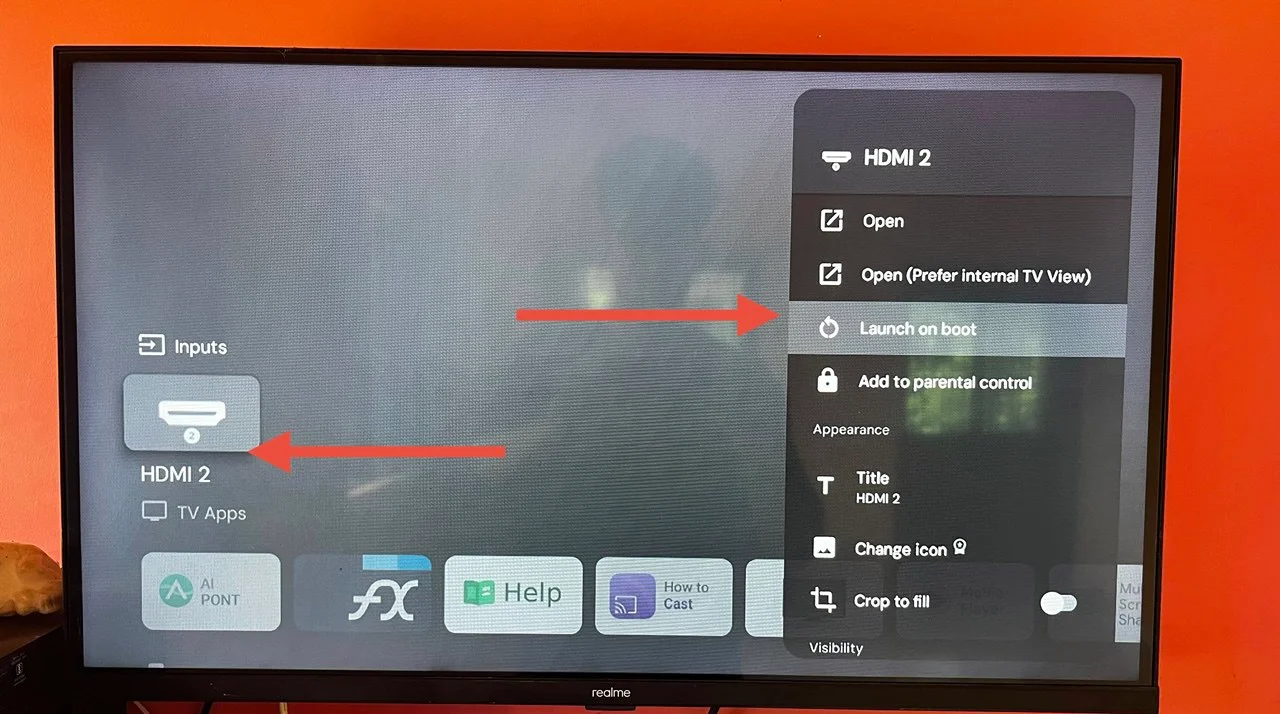
Step 8: Alternative Quick Method (Optional)
- If you prefer, you can do this directly from the Projectivy home screen.
- On the home screen, find the tile (icon) for the HDMI input you want (such as HDMI2 or HDMI3).
- Long-press on that input using your remote.
- A menu will appear. Select “Launch on Boot.”

- This will also set that HDMI input to start automatically on power on.
Step 9: Exit Settings
- Once you’ve enabled “Override Current Launcher” and set the HDMI input for Autostart on Boot, exit the settings menu.
- Now Projectivy will always load first instead of the Google TV home screen, even if you press the Home button on your remote.
Step 10: Restart the TV
- To confirm that everything is working, restart your TV by turning it off and on.
- After booting, the TV should now open directly on the HDMI input you selected.
For example, if your DTH is on HDMI2, the TV will start on HDMI2 automatically without showing the Google TV screen.
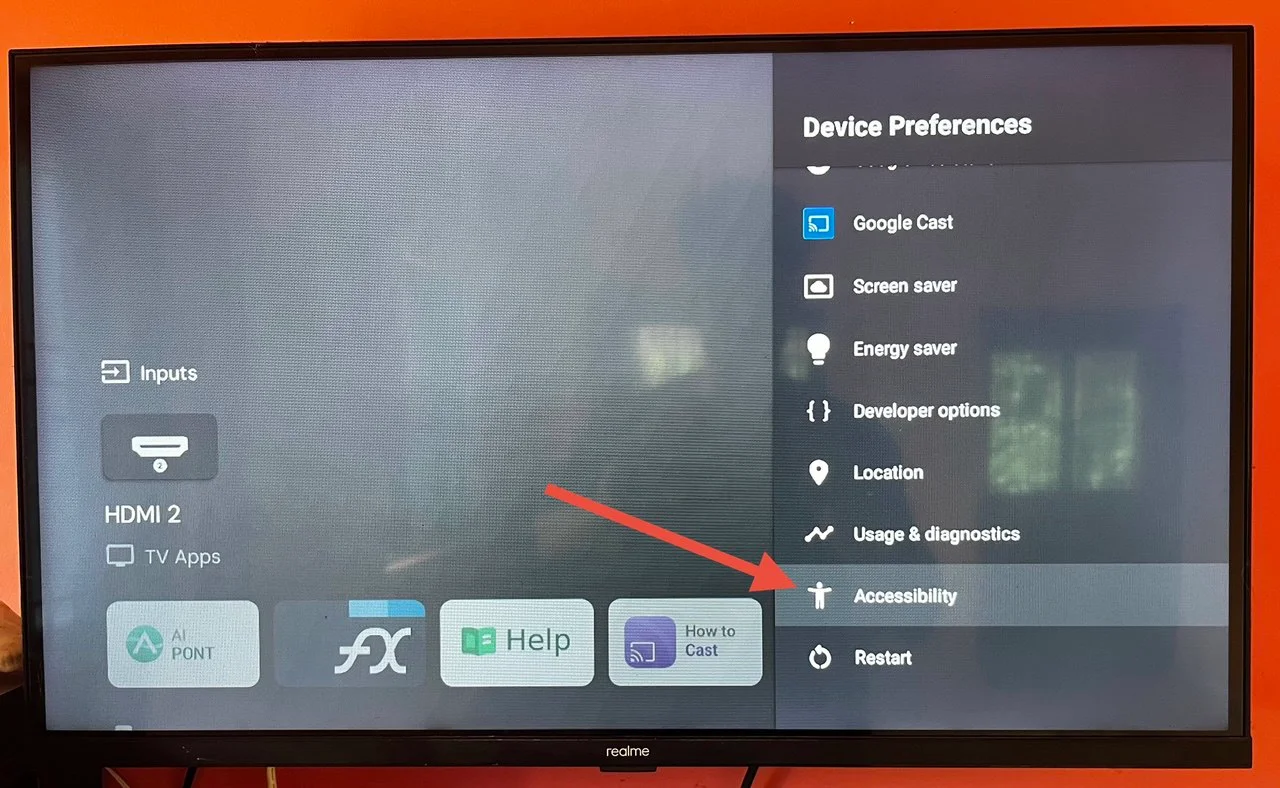
Troubleshooting
If the options like Override Current Launcher or Autostart on Boot are not visible:
- Open TV Settings from your device.
- Go to Device Preferences > Accessibility.

- Select Projectivy Launcher in the list and enable it.

If the Projectivy app does not open after installing from APK:
- Check that the Unknown Sources installation is allowed on your TV.
- Make sure the app has the necessary permissions.
Note: I tested this method on a Realme TV, but it works on any Android TV that does not include a built-in feature to set a set-top box or HDMI input as the default startup source.
That’s it. This is how you can set your TV to start directly in HDMI mode on power on without remote navigation, or simply set HDMI as the default input on any Android TV. Once configured, you no longer need to go through the Google TV home screen every time you switch on the TV.
If you have any questions, face issues, or need additional help, feel free to leave a comment below or contact us. We will be glad to assist you.


