Have you been struggling to figure out how to connect your Denon receiver to your TV? Don’t worry, you’re not alone. Many people find this process confusing and frustrating, but it doesn’t have to be. Here’s a detailed guide on how to connect your Denon receiver to your TV, step-by-step.
Imagine this: You’ve just purchased a brand new Denon receiver and a brand new TV. You’re excited to set it all up to watch your favorite movies and shows with incredible sound. But, after unboxing everything, you realize you have no idea how to connect the two devices together.
We are here to help. In this guide, you will learn how to connect your Denon receiver to your TV, no matter what model you have.
How to Connect Denon Receiver to TV
If you’re looking to connect your Denon receiver to your TV, you can do so in a few ways depending on the connection type of your device.
Here are three of the most common methods you can try:
- HDMI Connection
- Optical Connection
- Composite or Component Connection
Let’s break it down now.
HDMI Connection
If you’re lucky enough to have a TV and AVR that are ARC or eARC enabled, you’re in for a treat! With just an HDMI cable, you can take your audio experience to the next level by playing your TV audio through your AVR.
The best part is that you don’t need any extra cables or complicated setups. Just plug one end of the HDMI cable into your TV’s ARC or eARC-enabled HDMI port, and the other end into your AVR’s ARC or eARC-enabled HDMI port. That’s it!
If both your TV and Denon receiver have HDMI connections, you can connect the two using an HDMI cable, which will allow you to transmit both audio and video signals simultaneously. You won’t have to mess with wires and connections any more. Furthermore, with just one remote, you can control both devices and enjoy crystal-clear audio and video.
Connecting your TV to HDMI is super easy! Here are the steps you need to follow:
- You will need to locate the HDMI port on your TV and the Denon receiver.
- Plug one end of the HDMI cable into the HDMI port on your TV and the other end into the HDMI port on your Denon receiver. The cable must be connected firmly to both devices.
- Turn on your TV and Denon receiver, and switch your TV input to the HDMI input that your Denon receiver is connected to. If you’re not sure how to do this, refer to your TV’s user manual.
- That’s it! Make sure that both devices are turned on and that the HDMI cable is securely connected.
Don’t have an ARC or eARC-enabled AVR? No problem! You can still connect a Denon receiver to TV through optical or digital coaxial. Read the below ways.
Optical Connection
Nonetheless, so you want to connect your TV to your Denon receiver, but there is no HDMI port available. Nothing to worry about!
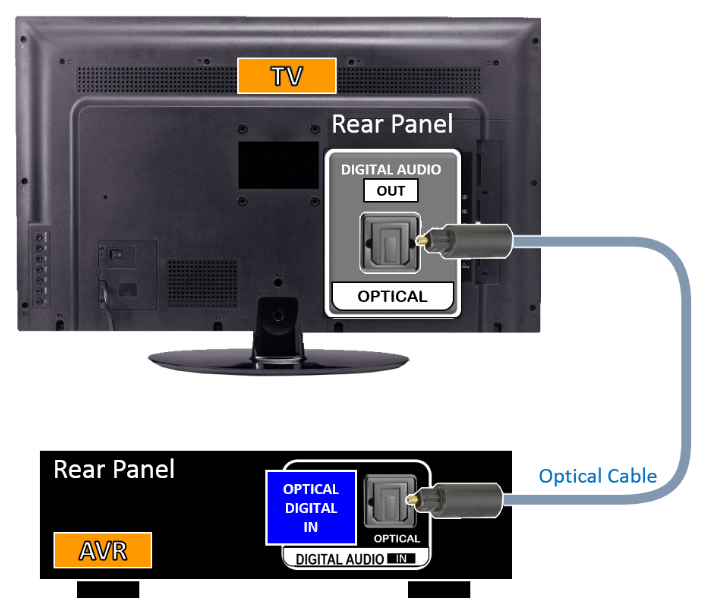
If your TV has an optical or coaxial audio output, you can use either an optical or coaxial cable to transmit audio signals to the Denon receiver. The following steps will help you:
- Find the optical or coaxial audio output on your TV. The output is commonly labeled “optical out” or “coaxial out.”
- Connect one end of the optical or coaxial cable to the corresponding output on your TV, and the other end to the receiver’s corresponding input.

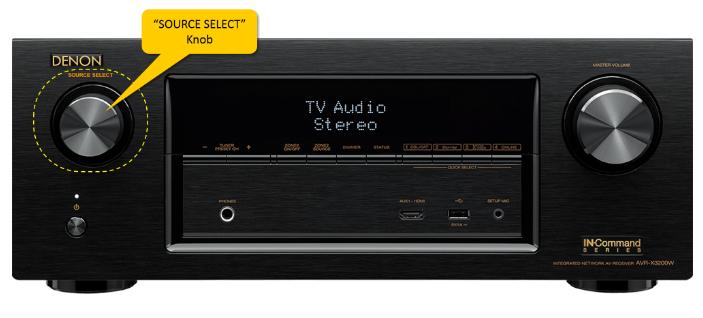
- Turn on your TV and Denon receiver, and set your receiver’s input source to the optical or coaxial input you just connected.

Coaxial Connection
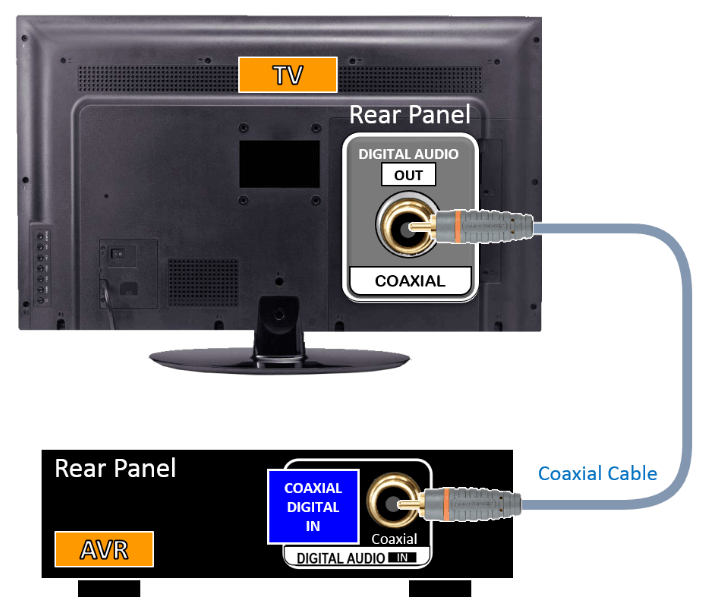
In case your TV and Denon receiver have coaxial connections, it is still possible to connect them. If you want to transmit only video signals, you can use a coaxial cable to connect the two devices. It’s as simple as this:
- Locate the coaxial output on your TV.
- Connect one end of your coaxial cable to the corresponding output on your TV and the other end to the corresponding input on your Denon receiver.

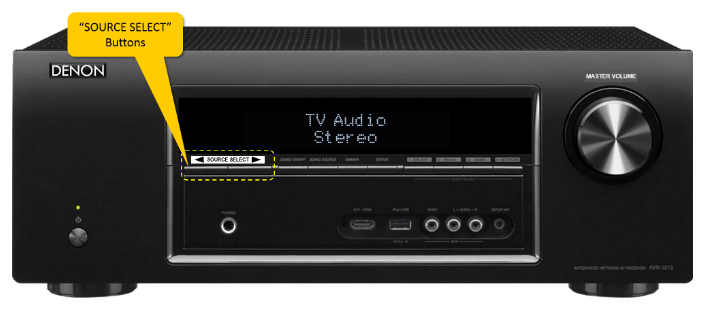
- Turn on your TV and Denon receiver, and select the input source on your receiver that corresponds to the coaxial input you just connected.

- It’s that simple! Your Denon receiver should now be able to display video content from your TV.
Note: If you’re using an optical or digital coaxial connection from your TV to your AVR, there’s one important setting you need to be aware of.
Make sure that your AVR’s HDMI Control setting is disabled in this case. This will turn off the AVR’s CEC (Consumer Electronics Control) setting, which can sometimes interfere with your setup. By disabling this setting, you’ll be able to open up the AVR’s “TV Audio” source and get the most out of your optical or digital coaxial connections.
To make this change, simply head to the “Video” section of your AVR’s GUI and select “HDMI Setup.” From there, you’ll be able to find and disable the HDMI Control setting.
ALSO READ: –
The connections available on your TV and Denon receiver may differ from what we’ve discussed, so it’s always a good idea to consult your TV and receiver’s manual. In the manual, you’ll find all the juicy details on how to connect to devices.
Trust me, reading the manual is not as boring as it sounds! It can actually be quite helpful and informative, and you might even discover some new features you weren’t aware of.
That’s all! You’ve made it to the end of our article on how to connect the Denon receiver to the TV. By now, you should have a good understanding of the different methods available and how to implement them.
Whether you’re using an HDMI cable, optical or coaxial cable, or composite or component cables, you must find the right connections and plug them in properly.
If you know any other method to connect Denon receiver to TV, let us know in the comments section below.

