In this article, we’ll find out how much obstruction is too much for Starlink and if it can still be used with them. We will discuss what obstructions are, how to check for obstructions, and how well Starlink works with different levels of obstructions.
Starlink satellite internet is designed to work optimally with an unobstructed view of the sky. The phased array antenna housed in the Starlink dish takes on the crucial task of actively tracking and communicating with satellites as they slowly orbit overhead.
However, keep in mind that there may be obstructions within the dish’s field of view, which spans about 100 degrees. Anything that comes in the way could momentarily disrupt smooth connectivity.
Starlink is easy to set up and use. First, you install the Dish and set up the Router. Once everything is in place, it’s simply a matter of catching the signal.
The real challenge: overcoming those annoying obstructions. It’s true that they can be quite annoying when it comes to receiving signals. But, through extensive time spent with Starlink and extensive research, it became clear that the problem had to be addressed in a direct way.
In the below sections, we will discuss how to identify and check for obstructions and how Starlink performs with different levels of obstructions.
What is Starlink Obstructed?
Obstructions are things that block the sky’s view. For Starlink users, trees are the most common obstructions. Tall trees near the dish can cause issues because the dish needs a clear view of the satellites. If communication between the satellite and the dish is interrupted, and there are no other satellites in its view, the Starlink dish is obstructed.
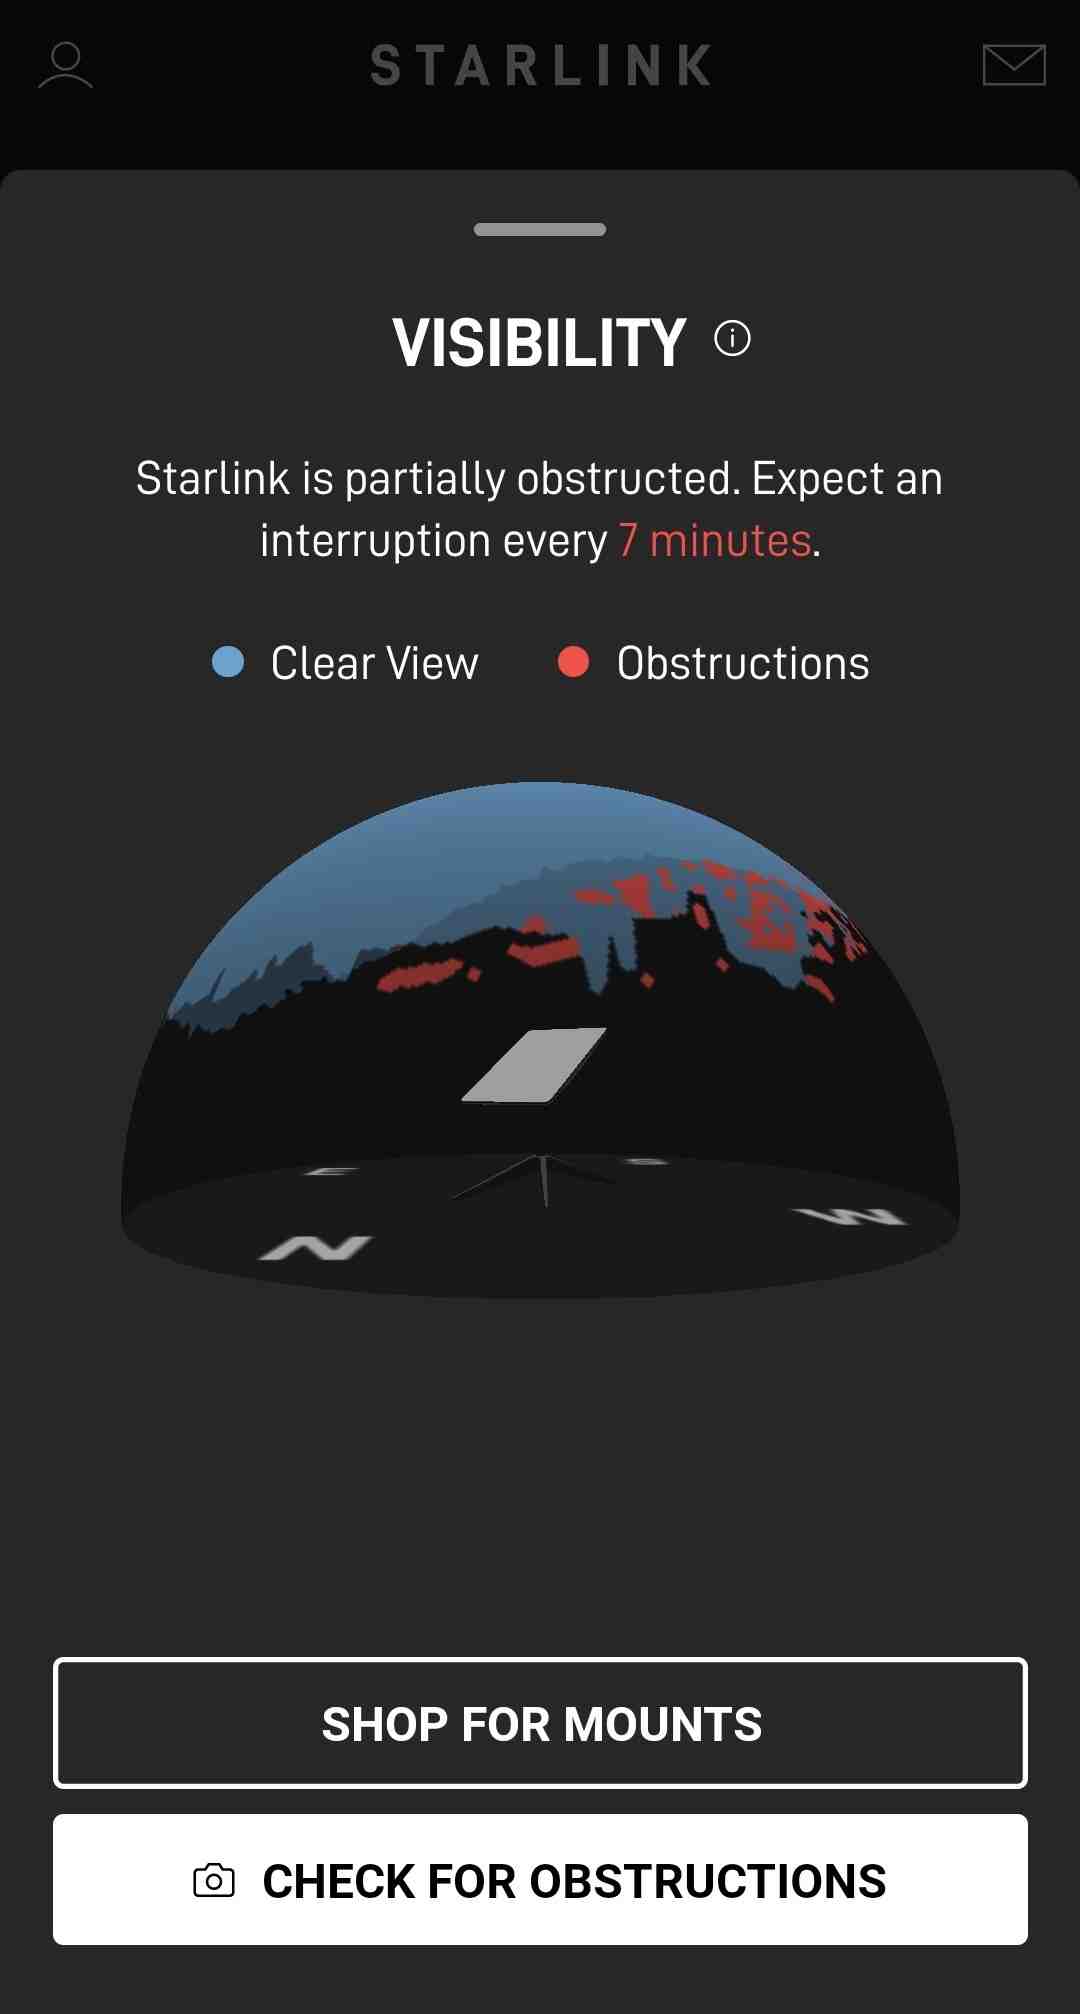
Once your Starlink dish is set up and the Starlink app shows an “Obstructed” message, this indicates a large number of obstacles are interfering with signal reception.
To get more information about the interruptions in your connection, tap on “Statistics” in the app.
During an obstruction issue with Starlink, your connection may be lost, leading to interruptions in activities like buffering, and a slow Internet connection. In most cases, interruptions last only a few seconds, but if there are many obstructions in your Starlink view, the interruptions can extend to minutes.
How to Check for Obstructions on Starlink
Checking for obstructions with Starlink is quick and easy, regardless of whether you’re an existing customer. Just open the Starlink app on your phone and use the obstruction detection option. It uses your phone’s camera to identify any potential issues with obstructions.
Here’s how to check for obstructions with Starlink:
- If you haven’t installed your Starlink dish yet, open the Starlink app on your phone and log in to your Starlink account.
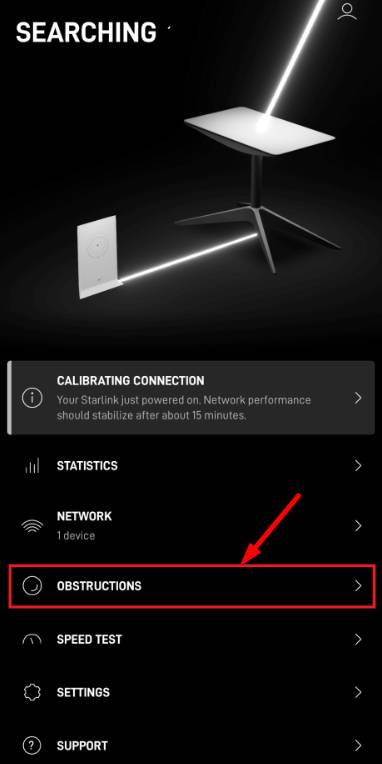
- Click on Obstructions

- Now, click on Check for Obstructions

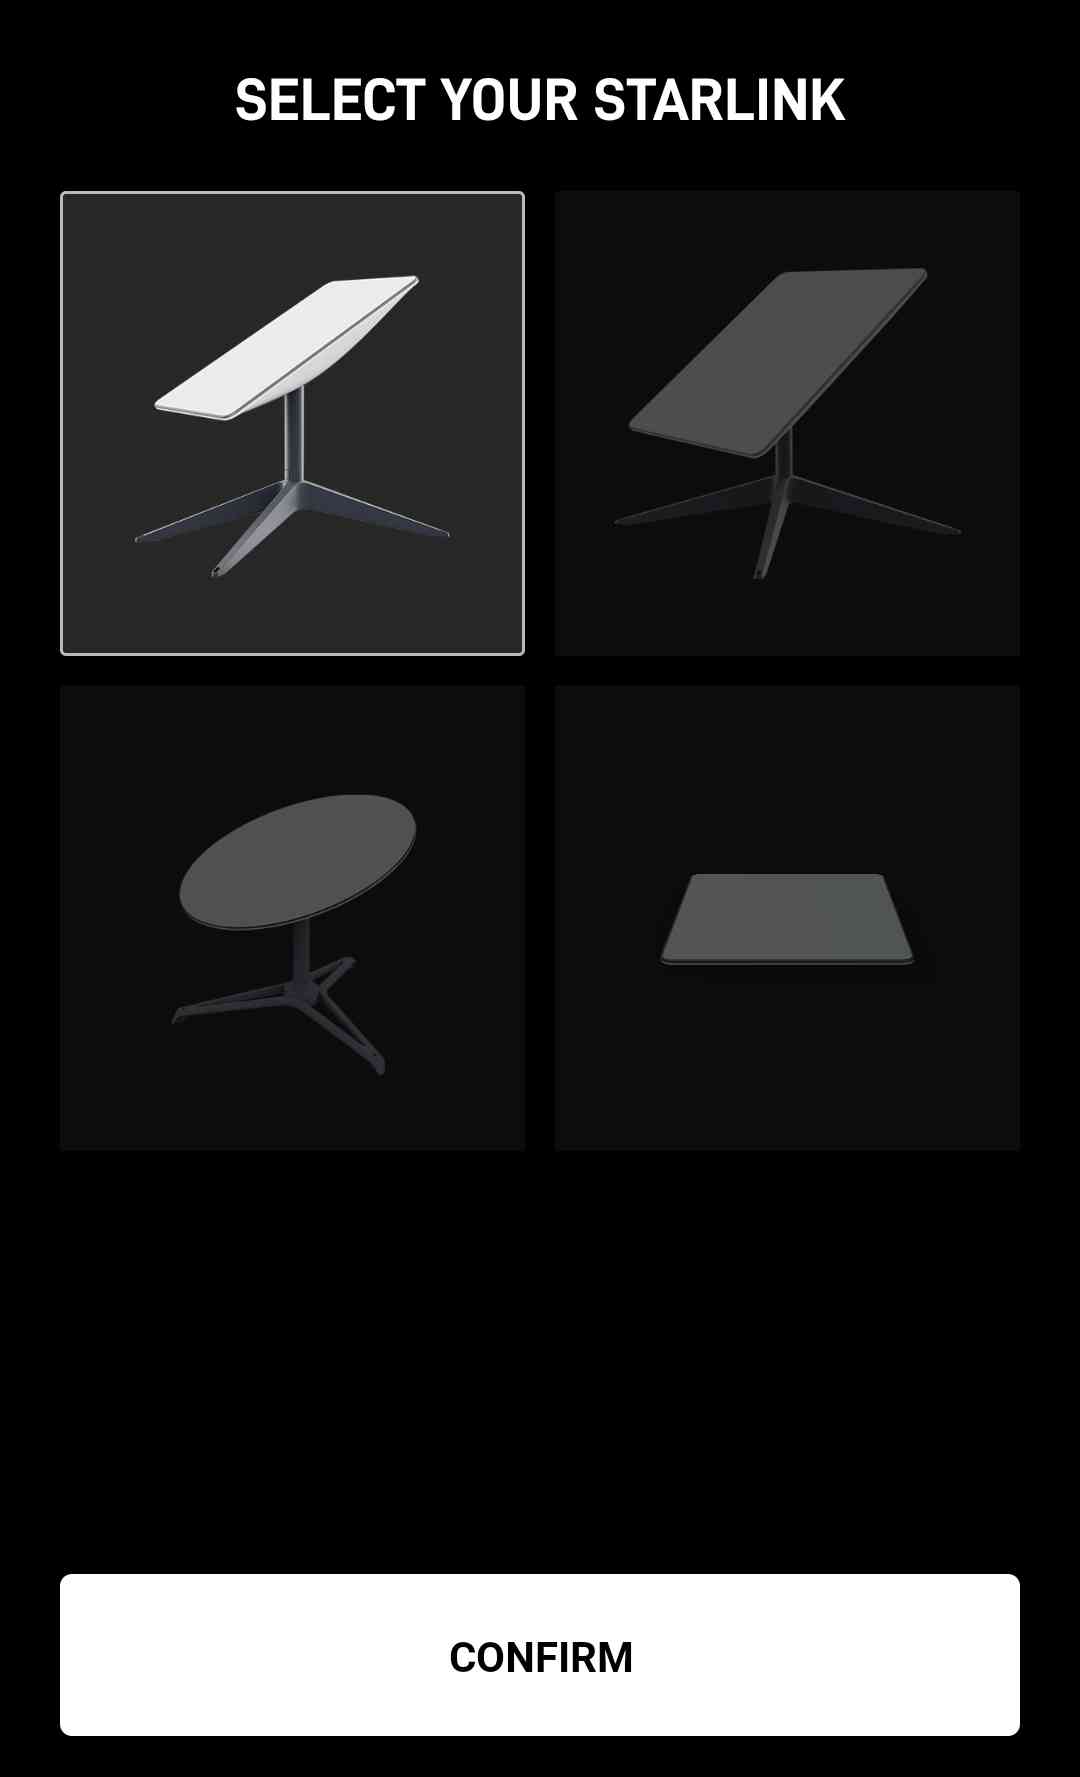
- After reviewing the instructions, select your Starlink and click Confirm

- After that, tap on I’m Ready.

- Use your phone’s camera to scan the entire sky as directed. The app will then calculate the expected percentage of obstructions for that location.

- Click on View Results once the scan is complete.

If your Starlink is already installed and has been running for at least 12 hours, the app will display obstruction data. During the initial 12 hours, Starlink will collect obstruction data. Later, under “Obstructions” in the app menu, you’ll see a graphical display showing where the obstructions are in relation to the dish. 
Does Starlink with Obstructions Work?
Yes. Starlink can still work with obstructions, but the impact depends on your internet activities and the options to address the obstructions. Video calls for work can be seriously affected by obstructions, causing noticeable and annoying problems. On the other hand, streaming movies and TV shows are less affected because of data buffering, making any obstruction outages hardly noticeable.
How Much Obstruction is too Much for Starlink
You can check your Starlink’s obstruction status with the obstruction checker tool within the app, enabling you to find out how well your Starlink will work with obstructions. Here’s what the percentages mean:
- 0%: Excellent. No outages due to obstructions.
- 1-5%: Some short outages occasionally. Most internet activities work fine, but gaming and video calls might be problematic.
- 6-10%: Real issues begin here. You’ll experience more frequent and longer outages. TV shows might buffer, and online gaming and video calls may have problems.
- More than 11%: Serious issues. Internet will be unreliable, streaming TV shows might have interruptions, and web pages could load slowly. Reliable connections, like video calling, become difficult for more than a few minutes.
How Accurate Is the Starlink Obstruction App
Although the obstruction check tries its best to map out obstructions in the path of the Starlink Dish’s view of the sky, it may not always be accurate.
The same job can be done by you, though. All you require is a keen eye and a clear idea of what to consider as an obstruction. In simple terms, solid objects and partitions can be a challenge for the Starlink Dish in receiving signals. So, be mindful of those while checking for obstructions.
It’s essential to be aware of other elements like plants, tree canopy, and frameworks, even though they may not seem as concerning at first glance. The reception of Starlink Dish signals can be particularly affected by trees.
Also, keep an eye out for interference from nearby antennas and dishes during the Starlink Dish installation, especially if it’s on an elevated surface.
Mount Starlink Dish without Obstructions
While Starlink is designed to be a flexible internet setup, randomly placing the Dish without consideration won’t do the trick.
Using the temporary mount initially might be okay for a short time, but for long-term use, you should plan ahead.
When choosing the location, keep in mind that the PoE cable provided can stretch about 150 feet (approx. 46 meters), giving you some flexibility. A stable surface like a parking lot, playground, or grassland works well for temporary setups.
For a permanent installation, investing in a sturdy mount, especially on an elevated surface, is essential.
For elevated surfaces like a porch eave, J-Mounts are ideal for mounting the Starlink Dish, while ladder mounts and Starlink’s Volcano mount work well for RV services. Pole mounts are great for obstruction-free setups, but may require some effort to set up.
Additionally, various Starlink accessories, whether from third-party sources or Starlink’s own, can be immensely helpful in avoiding obstructions and optimizing your setup.
When it comes to mounting Starlink in wooded areas, it may be possible, but it requires propping the Dish further away from trees to ensure a clear view of the sky.
Starlink recommends users in such areas to verify sky visibility before mounting, and using tall structures like poles or investing in a pole mount can be helpful.
RELATED ARTICLES:
- How to Claim Starlink Warranty (EASY GUIDE)
- How to Bypass Starlink Router (Guide to Activate Bypass Mode)
- How to Stow Starlink (Easy & Complete Guide)
- How to Fix Starlink Disconnected Error (2024)
- How to Update Starlink Firmware (2024)
- How to Reboot Starlink Router (Quick & Easy Guide)
- How to Reset Starlink Router (Guide 2024)
With minor obstructions (less than 5%), Starlink should work fine for most internet activities like browsing, email, and streaming. However, when obstruction percentages exceed 10%, the issue becomes more serious.
Simply use the Check for Obstructions feature on the Starlink app to detect any potential issues. If you encounter issues due to obstructions, the solution is either relocating the dish to a new spot or elevating it above the obstructions for a better sky view. Remember, proper mounting of the Starlink Dish is essential in avoiding obstructions effectively.
Frequently Asked Questions (FAQs)
What does it mean when Starlink is obstructed?
When Starlink is obstructed, it means there are physical barriers, such as trees or buildings, blocking the dish’s view of the satellites, causing potential interruptions in signal reception and internet connectivity.
Will Starlink work with obstructions?
Starlink can still work with obstructions, but the extent of its performance depends on the severity of the obstructions and their impact on signal reception.
What to do if Starlink is obstructed?
If the Starlink app indicates obstructions, follow these steps:
- Go to the location you want to set up Starlink or where it’s currently installed.
- Open the Starlink app and choose “Check for Obstructions” (or “Visibility” option if you are connected to Starlink).
- The guided experience will guide you through scanning Starlink’s field of view using the camera and assess obstruction levels.
- If there are any obstructions affecting your service, the app will show you.
- If the obstruction is above 10%, contact Starlink Support.

