Need to find or restore your Viber backup from Google Drive? Our detailed guide makes it easy to access, delete, or recover your data.
Viber is a well-known messaging app that lets users connect through texts, voice calls, video calls, and media sharing. Its simplicity, security, and ability to support group chats and calls have made it a popular choice among millions worldwide. With features like end-to-end encryption, cross-platform compatibility, and the ability to accommodate group chats and calls, it serves as a versatile communication tool for both personal and professional use.
One of the most important features of Viber is its backup functionality. Backups allow users to save their messages, photos, and other shared data securely. This is especially useful when switching devices, recovering accidentally deleted data, or restoring information after a technical issue. For Android users, Viber uses Google Drive to store these backups, ensuring they are safe and easily accessible whenever needed.
Google Drive, a cloud storage service by Google, plays a vital role in managing Viber backups. It allows users to save and access their files from anywhere, ensuring data security and convenience. While backups are essential, they can sometimes take up significant storage space on Google Drive. This might lead users to delete old backups or manage their storage more efficiently. Additionally, finding a specific backup or restoring one can be critical when recovering lost or important data.
This article provides a detailed, step-by-step guide to help you handle your Viber backups with ease and confidence. 
Step-by-Step Guide to Find/Delete/Restore Viber Backup from Google Drive
Find Viber Backup On Google Drive
Many users struggle to locate the Viber backup folder in their Google Drive. This is because Viber’s backup folder is hidden for security and privacy reasons.
- Go to Google Drive website using a browser. If you’re accessing it from a mobile phone, switch to the desktop version.
- Enter the email address and password of the Google account connected to your Viber app.
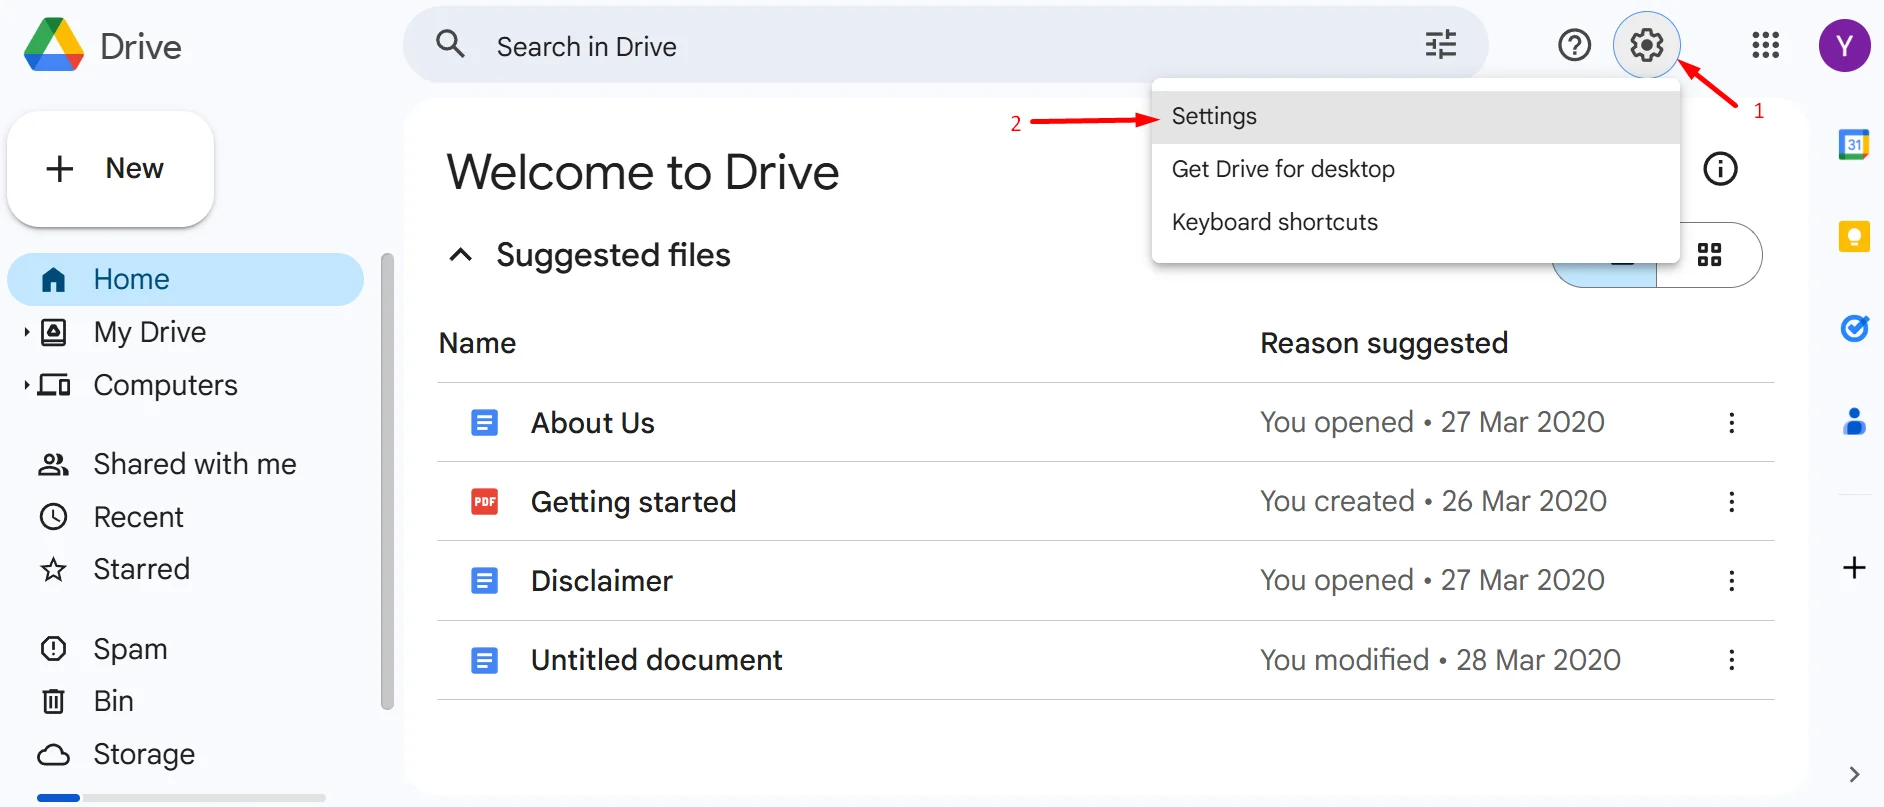
- In the top right corner of the Google Drive interface, you’ll find a gear icon (Settings). Click on this icon to open a dropdown menu. From the menu, select the “Settings” option to access the settings panel.

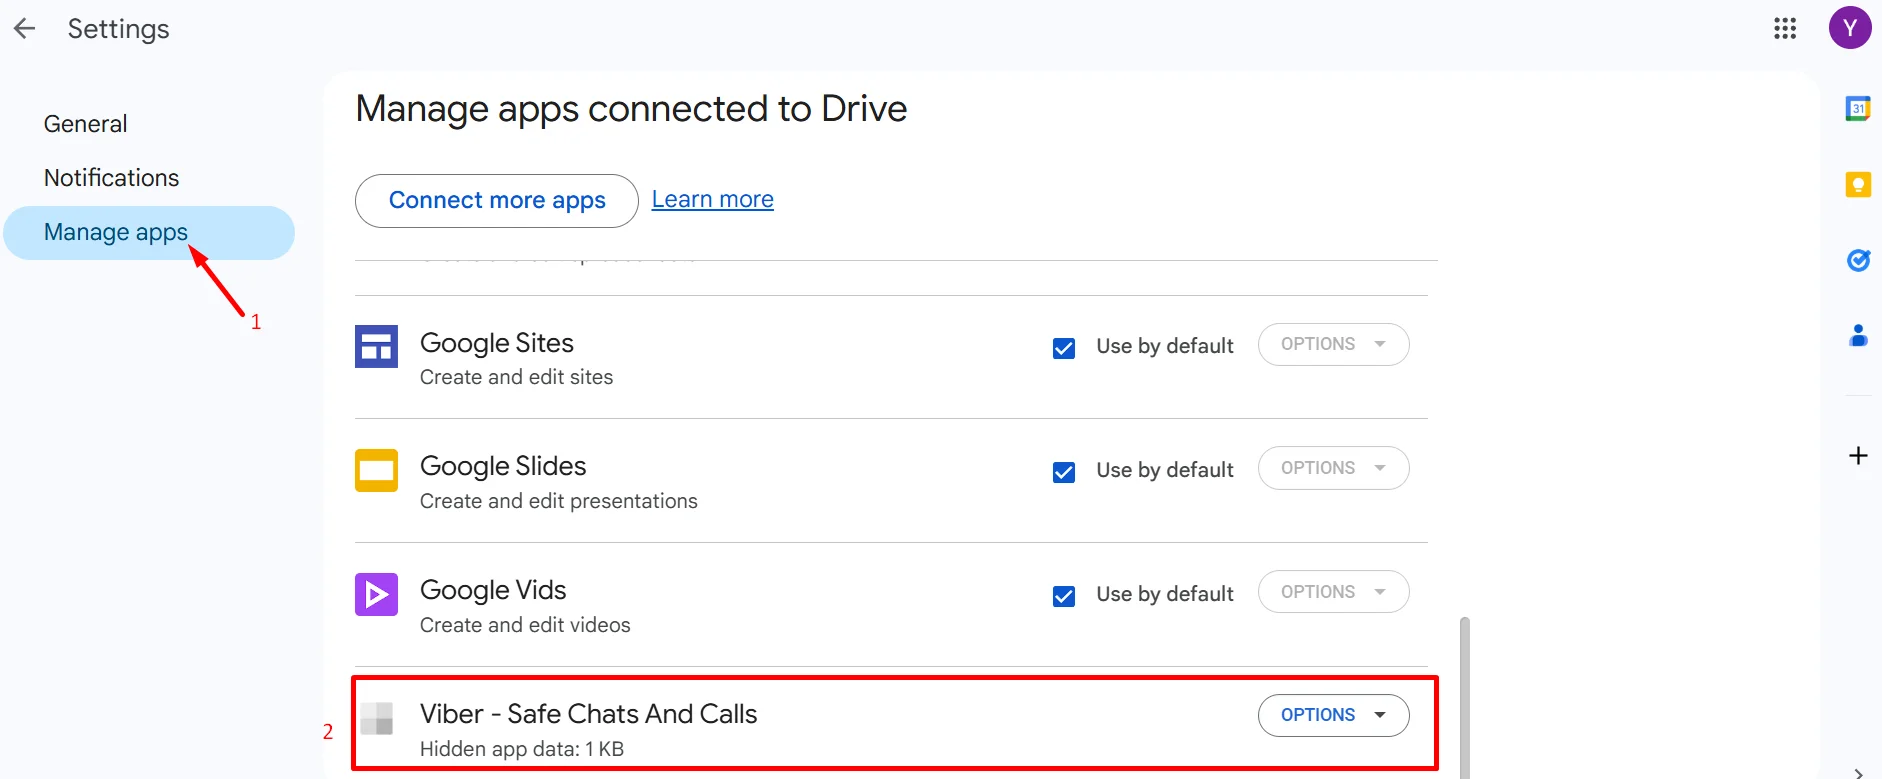
- In the Settings menu, look at the options listed in the left-hand column. Find and click on the “Manage Apps” option.
- Scroll down through the list of apps to find “Viber” in the list. This is where Viber’s backup data is stored.

Delete Viber Backup From Google Drive
If you need to delete your Viber backup from Google Drive, here are the simple steps.
- Visit https://drive.google.com/ in your browser. Use the desktop version if on a mobile device.
- Click the gear icon in the top-right corner and select “Settings” from the dropdown menu.
- In the Settings menu, click on “Manage Apps” in the left-hand column to view apps using Google Drive storage.
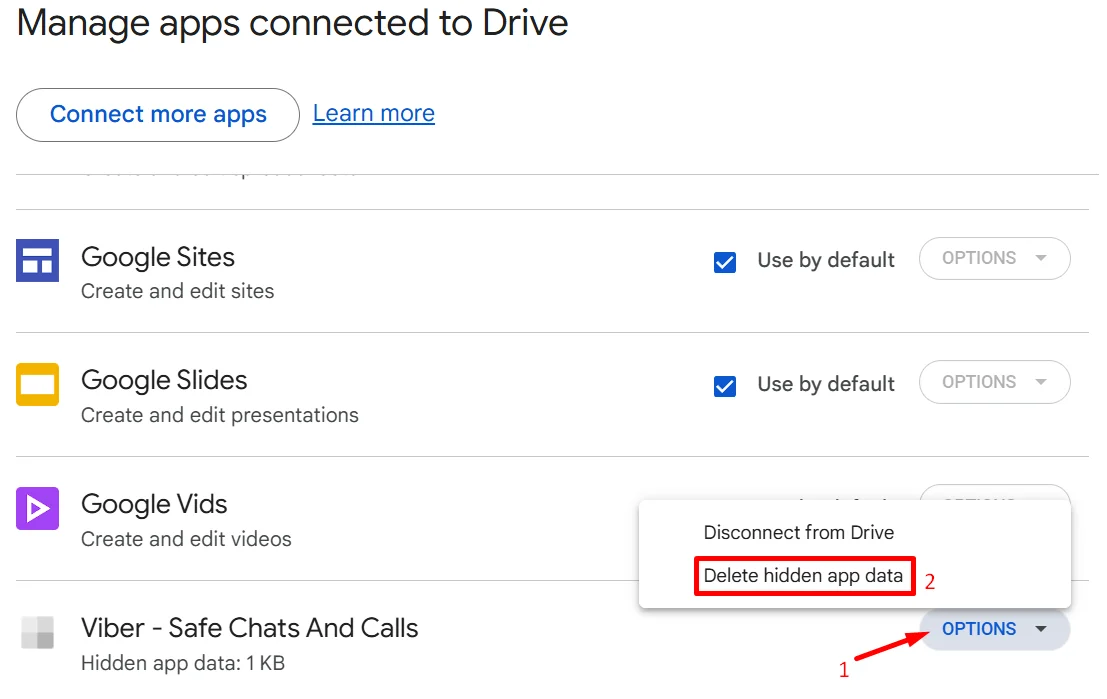
- Scroll through the list to find “Viber.” Click the “Options” button next to it.
- Now, choose “Delete Hidden App Data” and confirm to remove all Viber backup files.

Restore Viber Backup From Google Drive
If you’ve switched to a new phone or want to retrieve your old Viber messages stored in Google Drive, you can easily do so. This method works on both iPhone and Android.
- Download the Viber app on your phone.
- Open it, log in, and ensure it’s connected to the same Google account with the backup.
- Now, download the Viber app on your new phone. Open the app and log in with your Viber account details. Ensure your Viber is linked to the same Google account where the backup is stored.
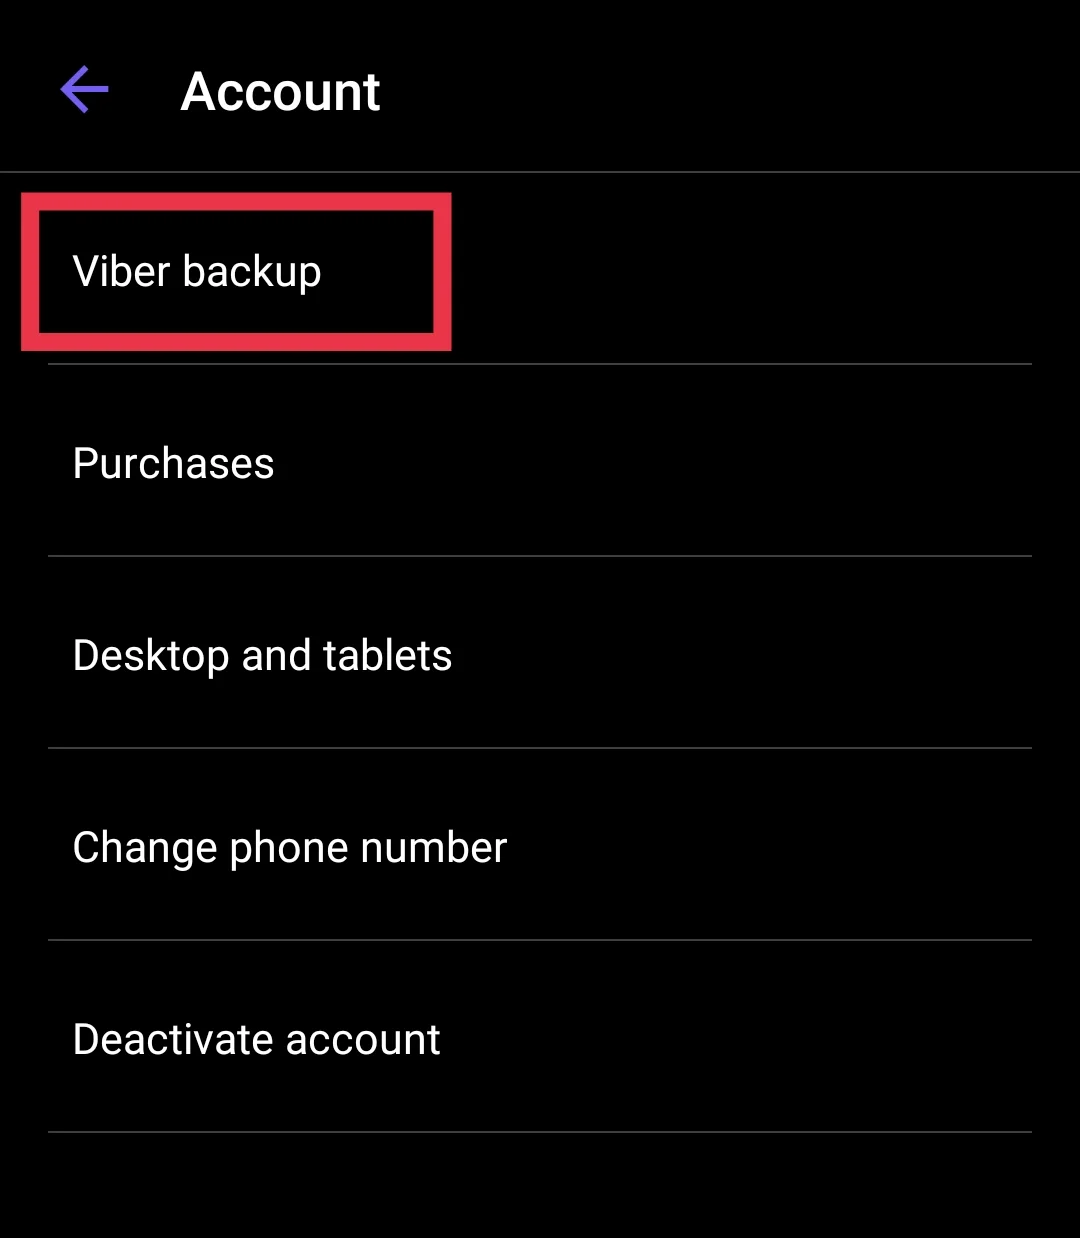
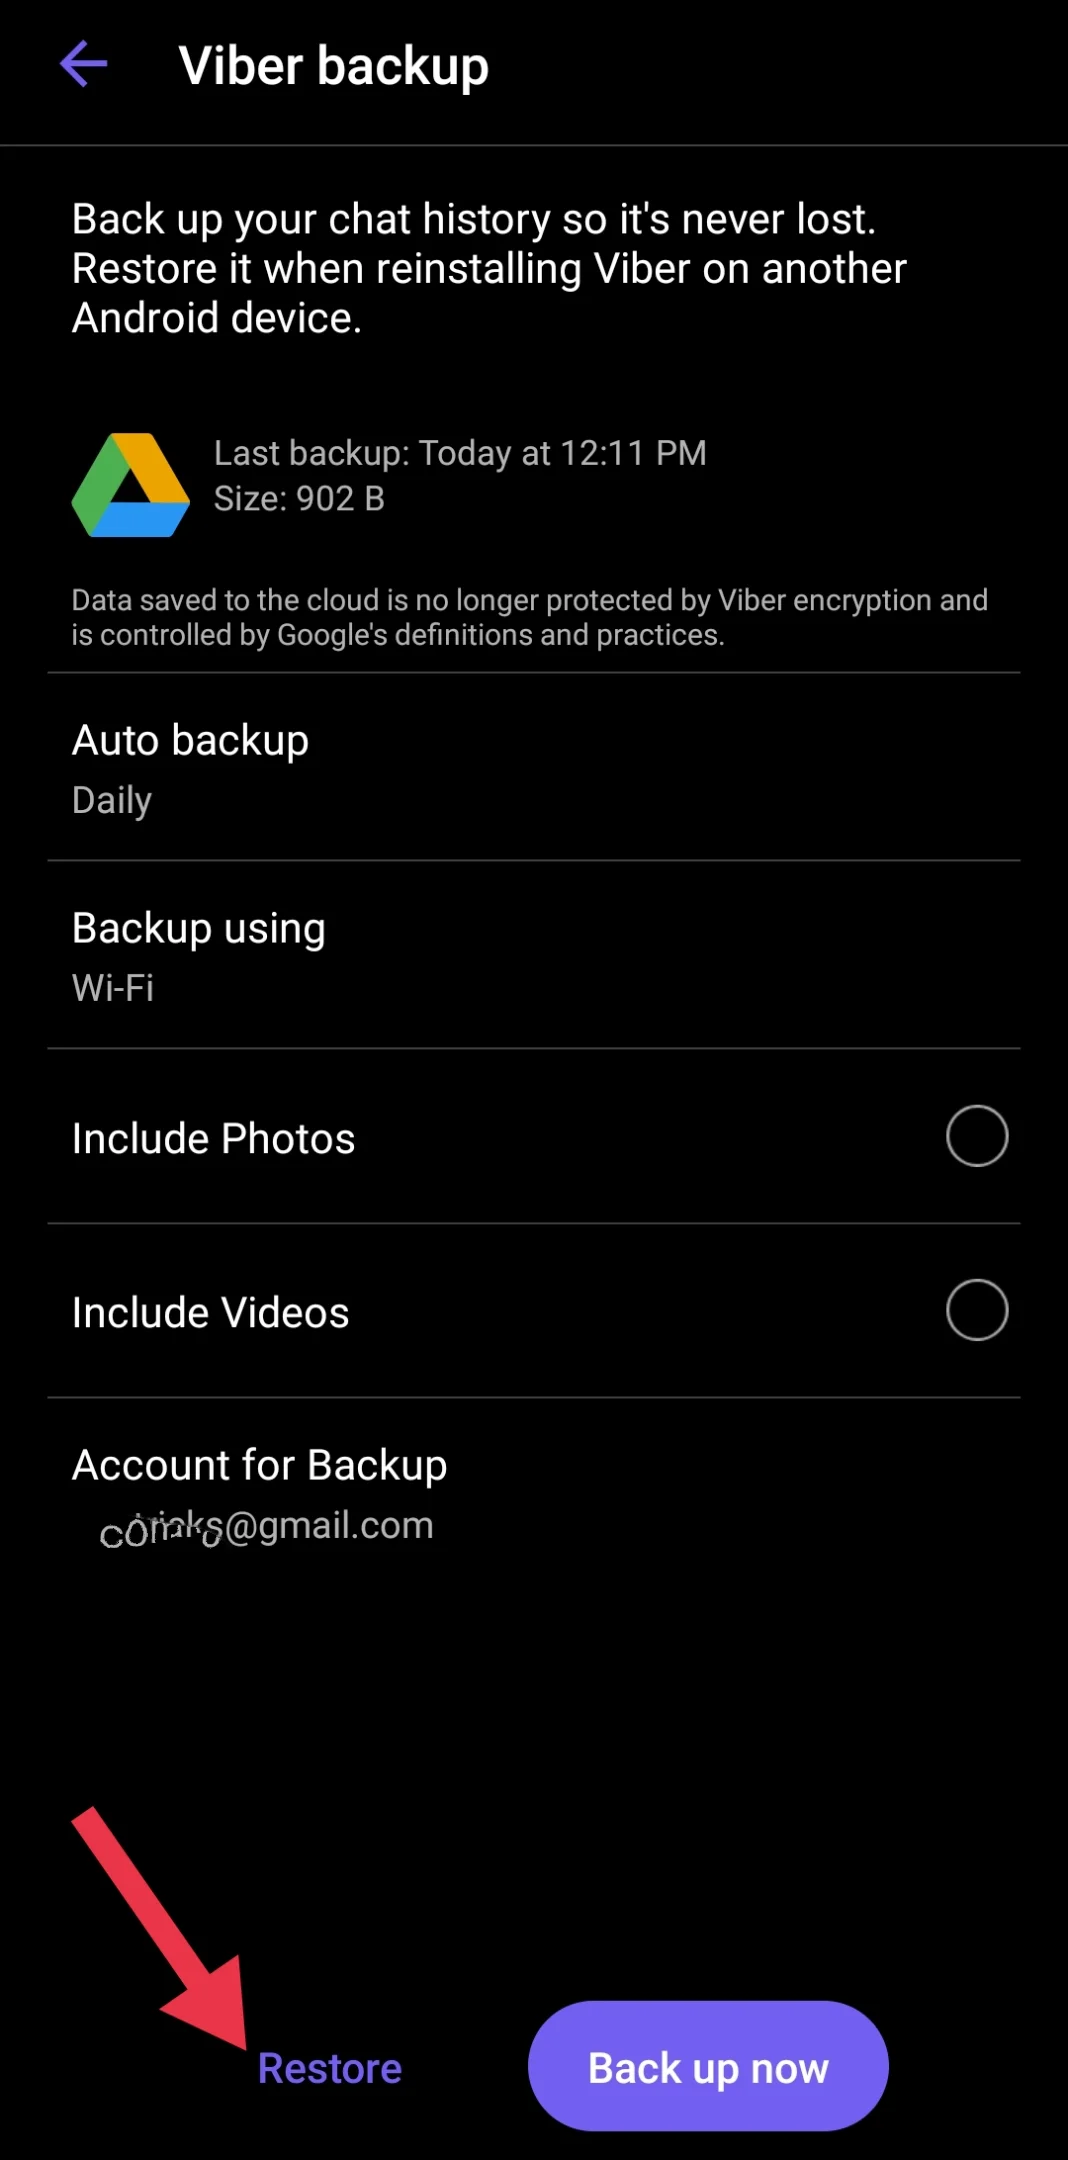
- In Viber, tap the “More” button at the bottom right, go to “Settings,” then “Account,” and select “Viber Backup.”

- Tap “Restore” in the backup menu.

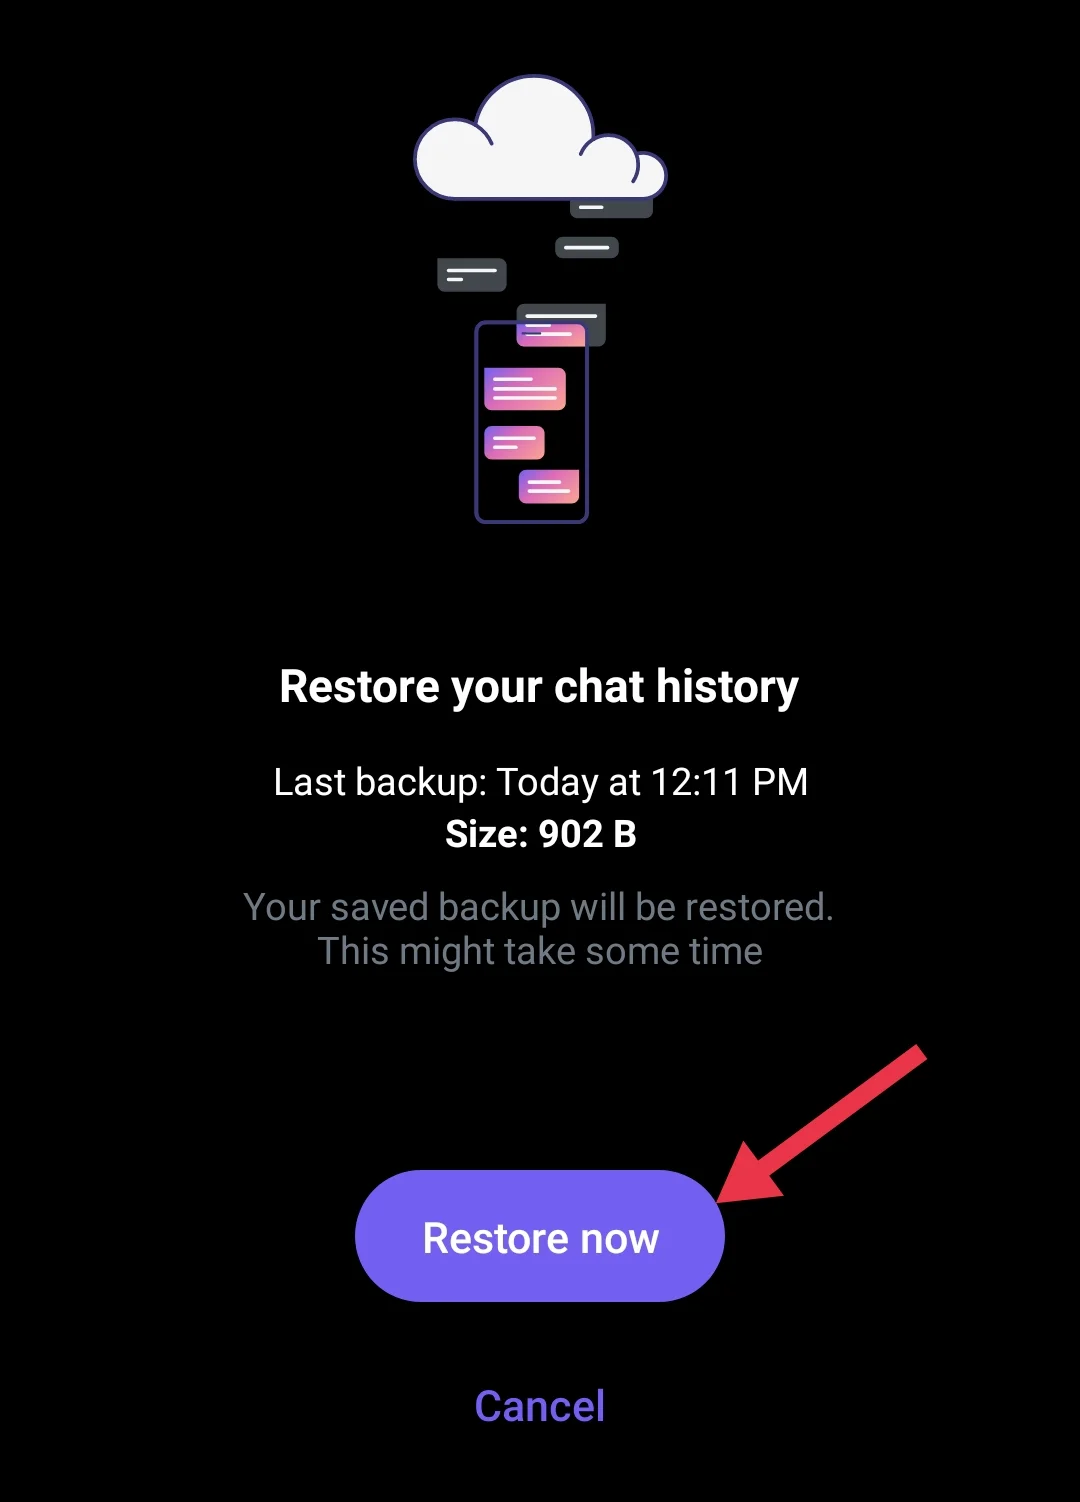
- Click “Restore Now” to begin the restoration.

- Wait for the process to finish. Once done, check your messages in the Viber app.
How to Backup Viber to Google Drive
If you’re unsure how to back up your Viber data to Google Drive, forgot the process, or had someone else set it up for you last time, follow the instructions below.
- Open the Viber app on your phone and log in with your number
- Tap the three dots located at the bottom-right corner to open the menu.
- From the menu, select “Settings.” Then, tap “Account” and choose “Viber Backup” from the list.
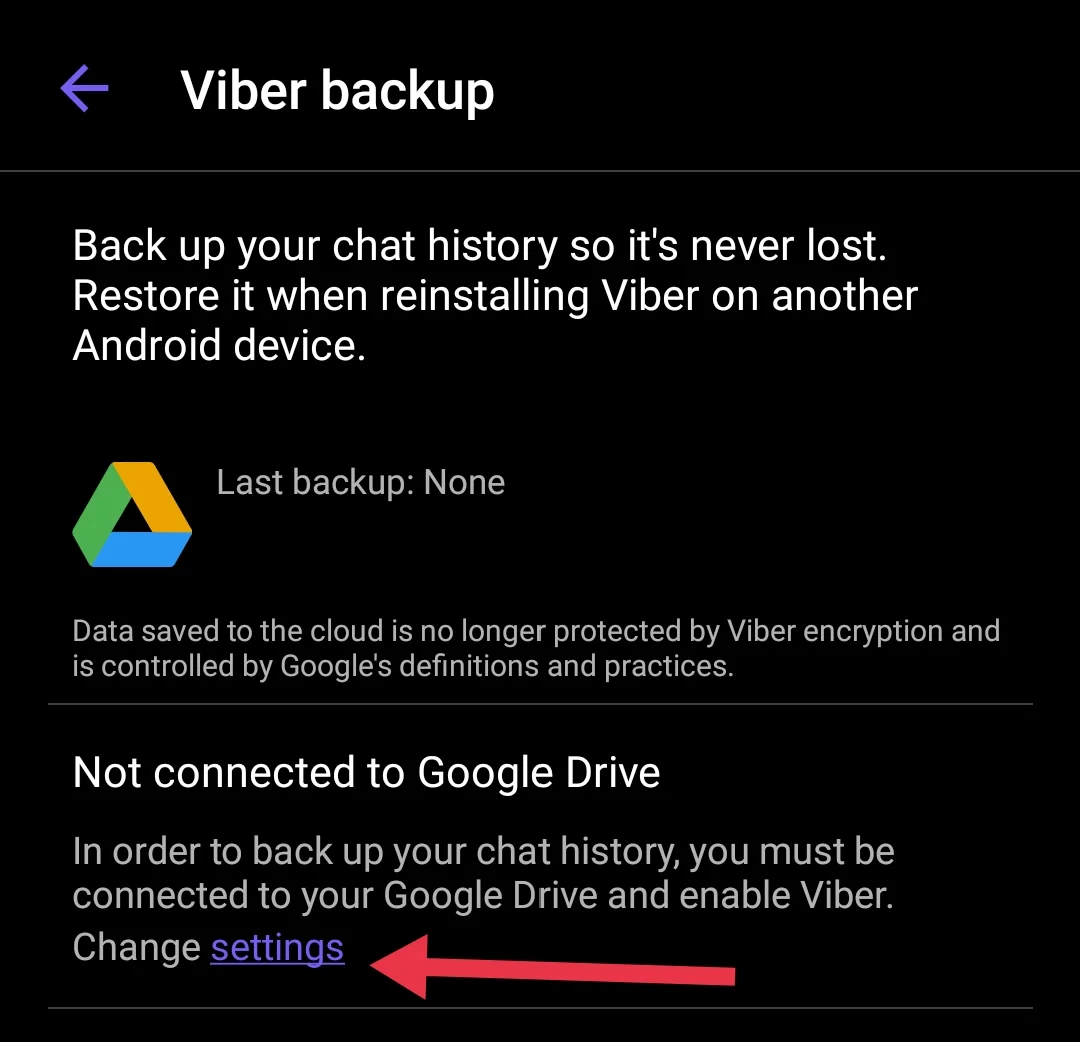
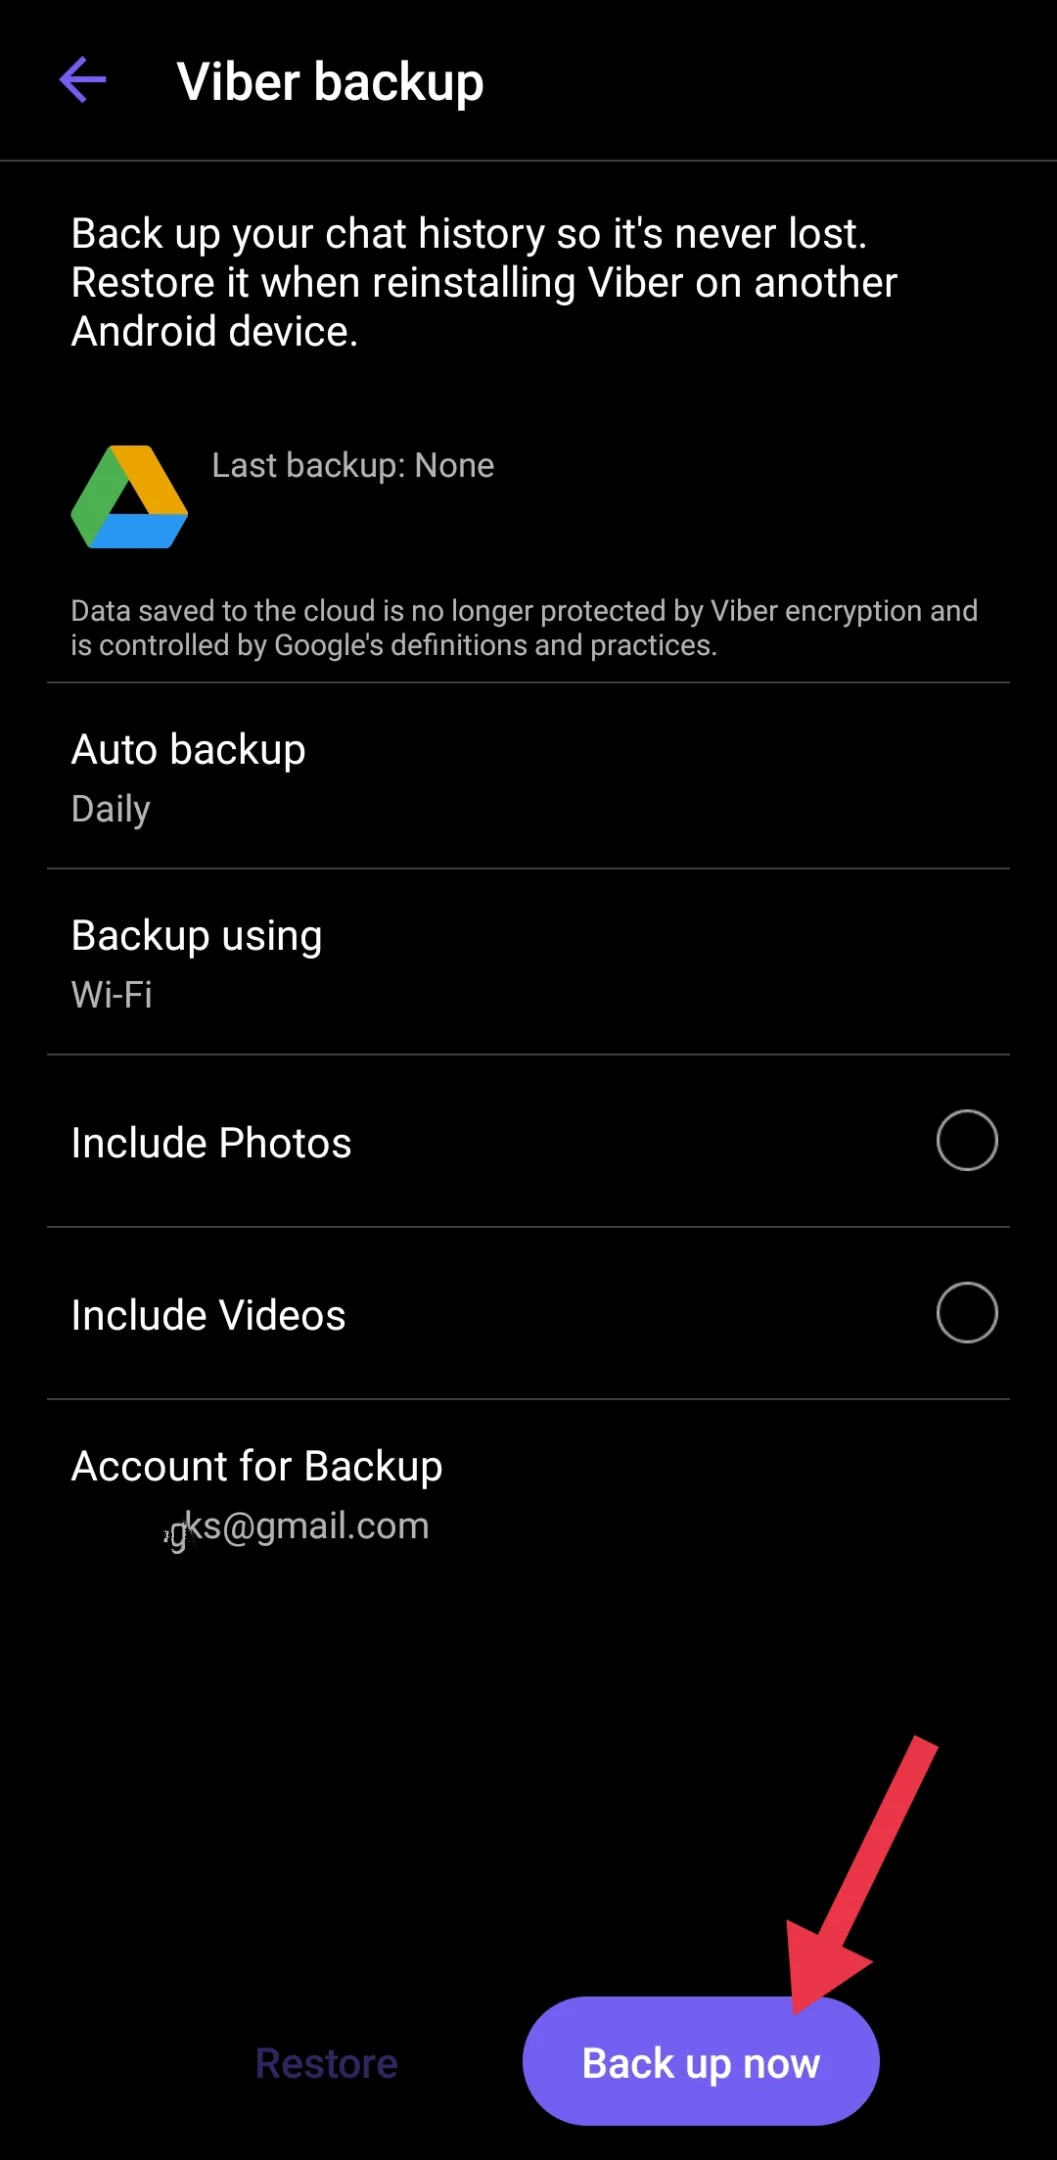
- On the next screen, tap “settings.”

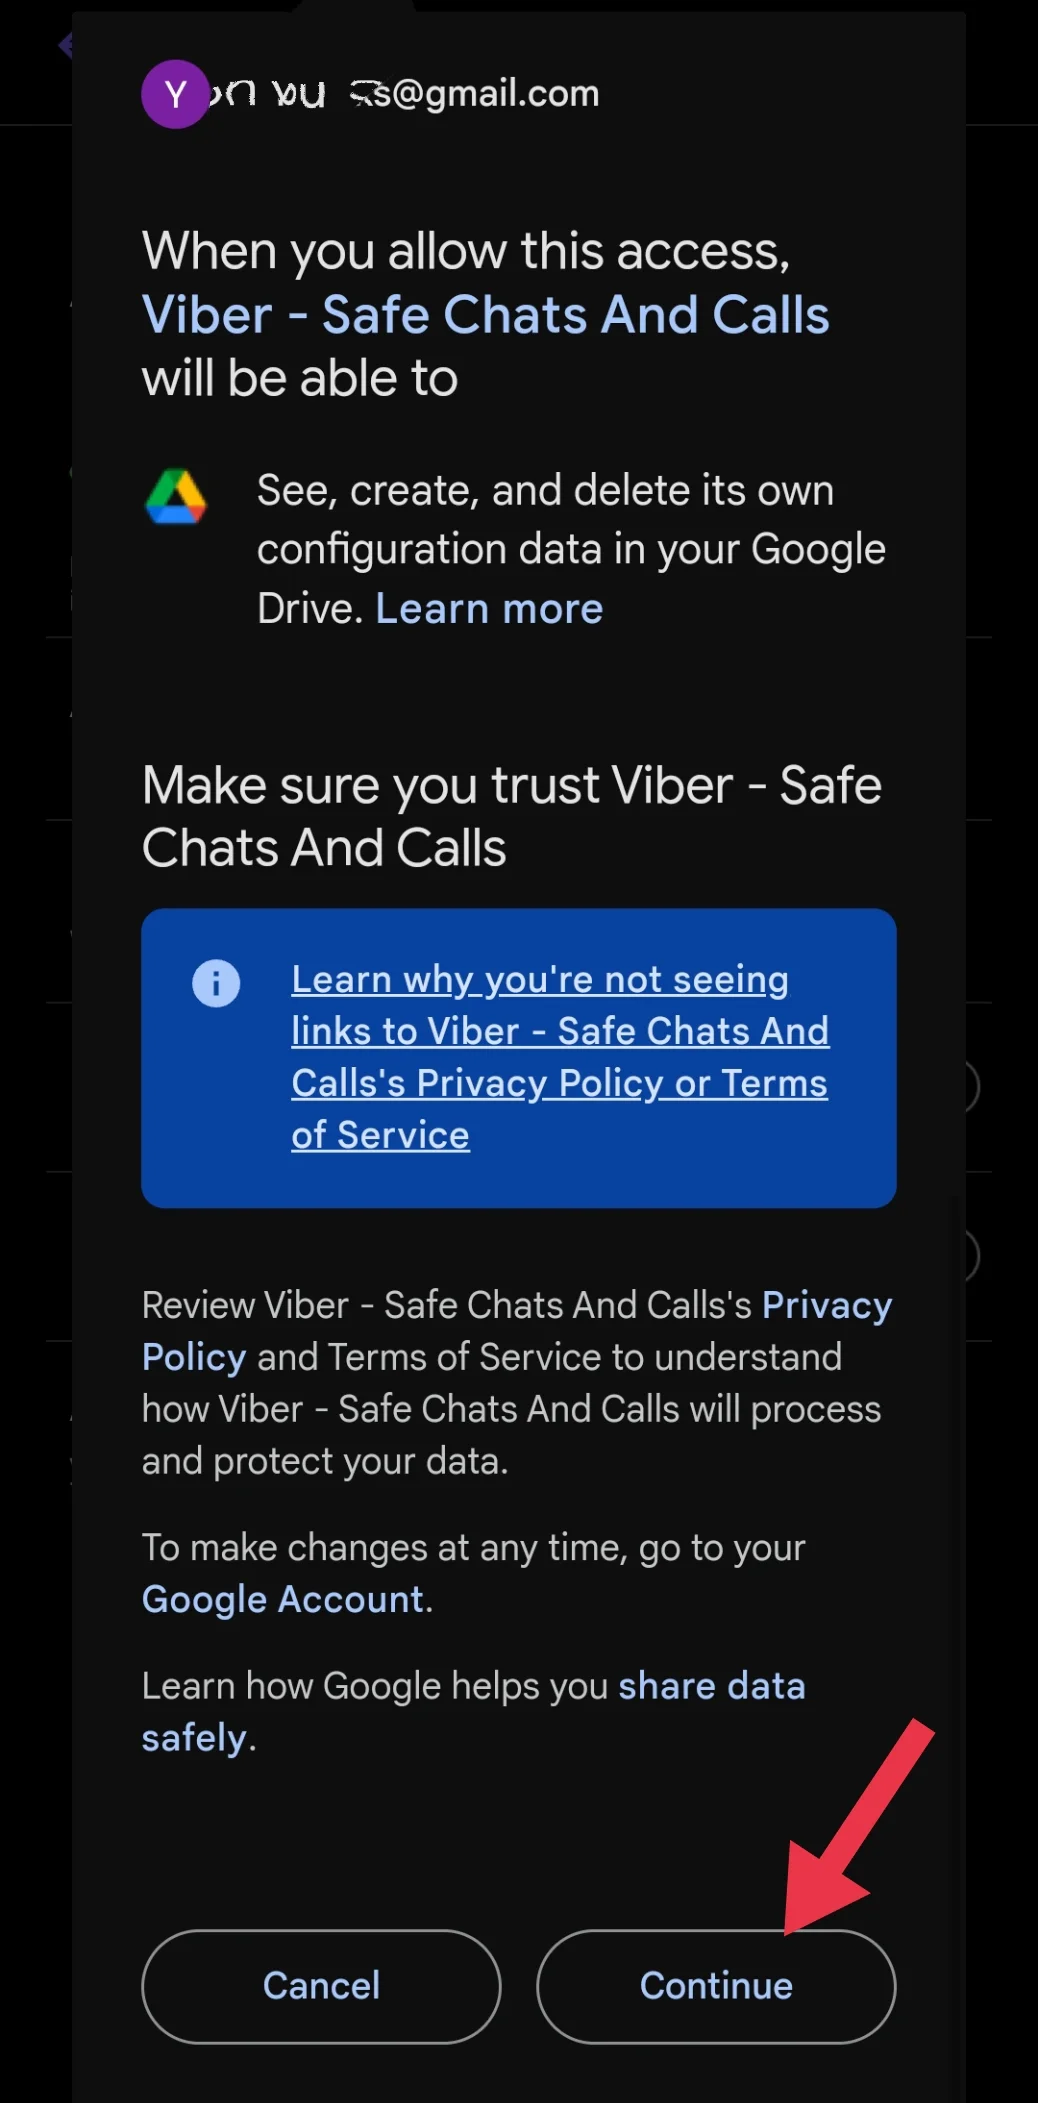
- Select the Google account you want to use for the backup. Tap “Continue” to grant Viber access to your Google Drive.

- Choose how often you want backups to occur (e.g., daily, weekly, or monthly), and decide if you want to include videos in the backup.
- Click on “Back up now“ to instantly take backup of current chat history to Google Drive.

- Also, your Viber data will now back up automatically based on your chosen settings. To check the last backup, return to “Viber Backup” in the settings and look for the “Last Backup” date and time.
RELATED: –
Finding your Viber backup in Google Drive can be tricky, especially since it isn’t visible on the mobile app. To access it, you’ll need to log in through the website. With Google Drive’s 15GB limit for free storage, clearing old backups like Viber might become necessary to make room for other files. If you’re planning to restore old chats from a saved backup, we’ve laid out the detailed step-by-step guide above. We hope you find this guide helpful. We’d love to hear your thoughts on this guide, so drop us a comment below!

