Each operating system has its bunch or set of software and drivers that allow it to access the hardware parts of your PC System and other peripheral units.
During the booting process in your system, users can choose the operating system they wish to boot into without affecting the other operating system. Through this article, you’ll learn about how to dual boot two operating systems on a single PC like Ubuntu OS with Windows 10. 
System Requirements for Dual Boot
Before downloading and installing Ubuntu OS with Windows 10 (dual boot), the following system requirements are required to initiate the process –
- Microsoft Windows 10 (32-bit or 64-bit)
- A minimum of 4 GB of RAM is required for this process.
- Your system should have at least 25 GB of Free Space in your system.
- A fast and strong internet connection to download all the drivers’ updates and other hardware-related updates when you install Ubuntu on your system.
- A CD/DVD drive or a USB Drive for the installer media along with bootable USB software like Rufus software.
How to dual boot and install Ubuntu 20.04 LTS on your system
- Download the Ubuntu ISO File from its main website
- To download the latest version of Ubuntu Operating System, that is, Ubuntu 20.04 LTS, just visit the Ubuntu website in your web browser and search for Ubuntu 20.04 LTS
- Now, download the Ubuntu ISO File by clicking on the Download button.
Download and install Rufus Software
- Visit the official website of Rufus in your web browser to download the software.
- Now, click on Rufus 3.17 which is the latest version of the software, and download the software and the downloaded file will be saved into your system in the Downloads folder.
- Now, open the Downloads folder in your system and click on the “Rufus.exe” file and install the application. Now, you’re ready to create a bootable USB Drive of Ubuntu.
Create a Bootable USB Flash Drive through Rufus
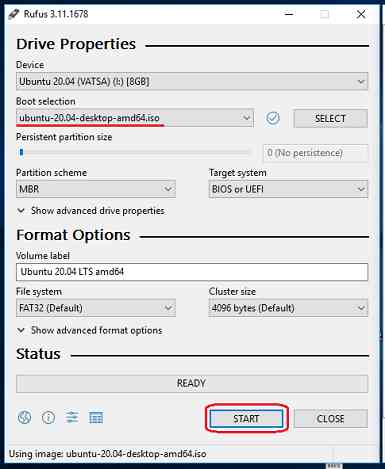
- Insert your USB Drive (Pen Drive) into your system and open the Rufus application. Now, select your USB Drive from the drop-down menu in the Device section.
- Now, there is another section named Boot Selection” where you’ve to pick the Ubuntu ISO File from the drop-down menu which you’ve downloaded from the official website.

- Now choose the partition scheme (MBR or GPT) of your system. And, rest of the settings will adjust automatically on the app. Now, click on the Start button to proceed again.

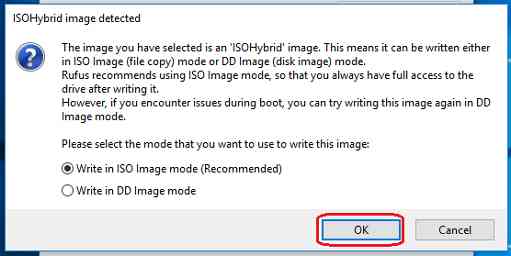
- Now, a pop-up message will appear on your computer screen which you totally ignore and Just click on the OK button.
- After 10 to 15 minutes, the process will be completed and now your bootable USB Drive is ready to use.

Create a Partition Space in your System for Ubuntu
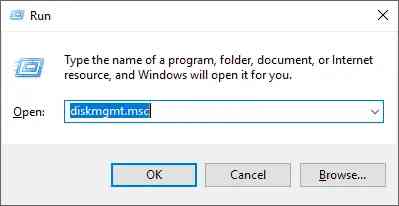
- Click on the Start menu and search for the Run option on the search box. Or you can try the shortcut key (Windows Key + R) to open the Run dialog box.

- Now, enter the command “diskmgmt.msc” on the command box and press Enter key.

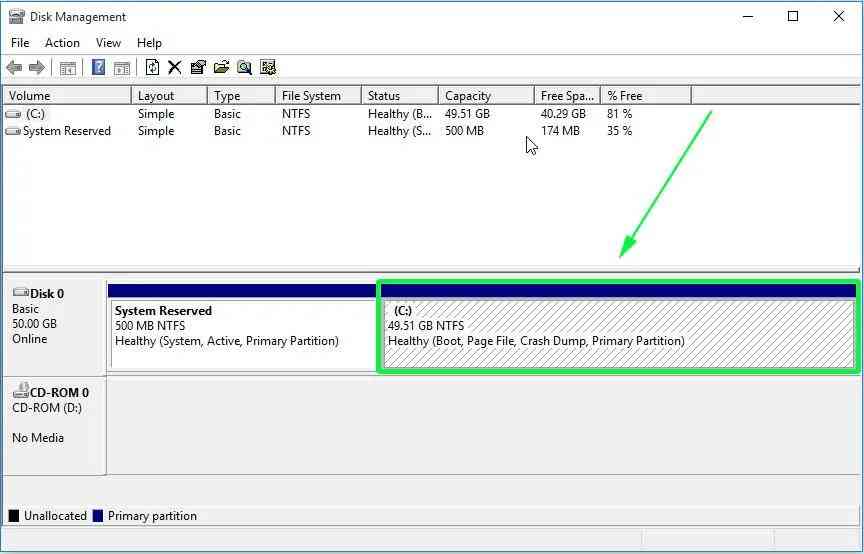
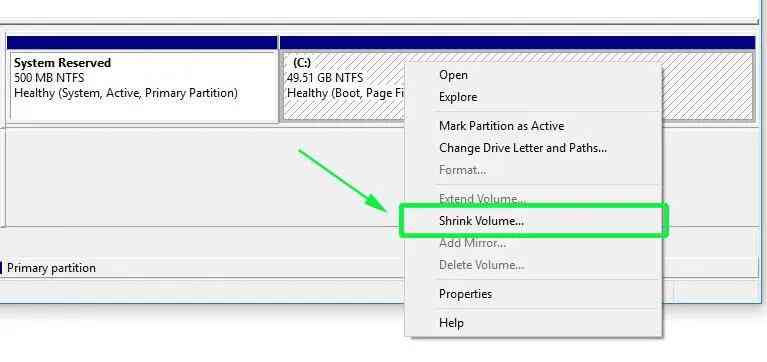
- Now, the Disk Management window will open on the screen. To compress the size of any particular disk that you want to store the Ubuntu files, select the drive and then click the right button of your mouse and choose the “Shrink Volume” option.

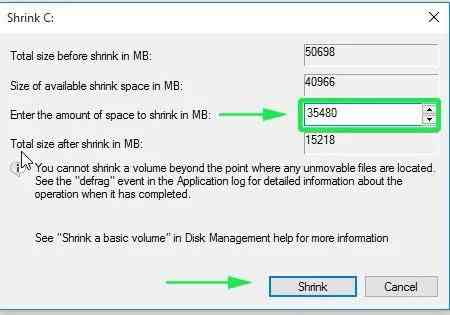
- Now, a new window named Shrink C: will appear on the screen. Now, you’ve to enter how much space you want to compress or shrink in MB and click on the Shrink button. E.g., if you want to shrink 60 GB, then enter 61440 MB in the “enter the amount of space to shrink to MB” option.

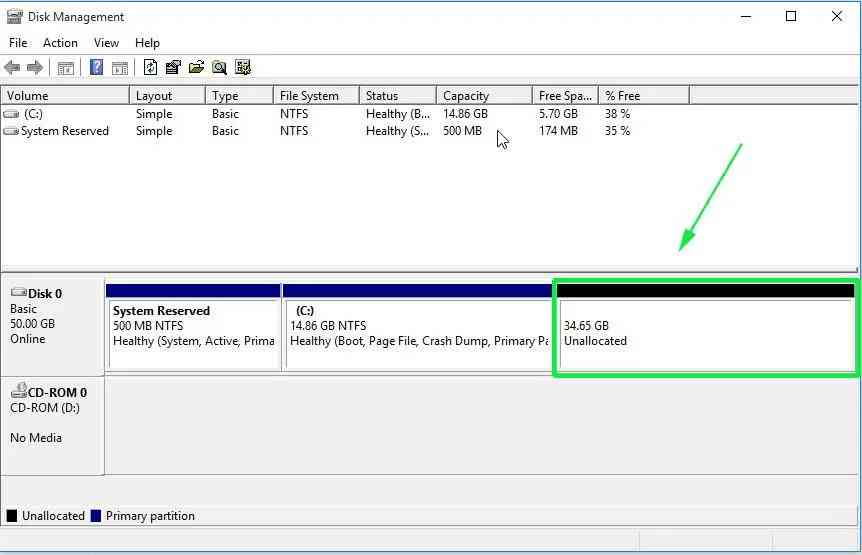
- When you complete this process, you’ll see a new unallocated space (or free space) that can be used as a new partition space or volume on your system.

Boot your PC system through BIOS
- Now, plug in your bootable USB drive in the system and restart the system. While restarting your system, press the Boot Key of your system (in most cases, the Boot Key are F10 or F12) to open BIOS. Generally, the Boot keys are different for different computer systems.
- Now, the BIOS screen will open. Now, select the UEFI/BIOS boot mode for your system. There are two boot modes – Legacy mode for GPT Partition and UEFI mode for MBR Partition. Choose the desirable boot mode as per your partition style.
- Now, select the drive which you want to boot first like if you want to boot your bootable USB Drive then arrange it in 1st boot device and then place another device in 2nd boot device, 3rd boot device, and so on.
- Now, press the F10 button to save the BIOS settings and click on the Yes option. Now, your system will reboot with the updated BIOS settings.
The installation process of Ubuntu OS
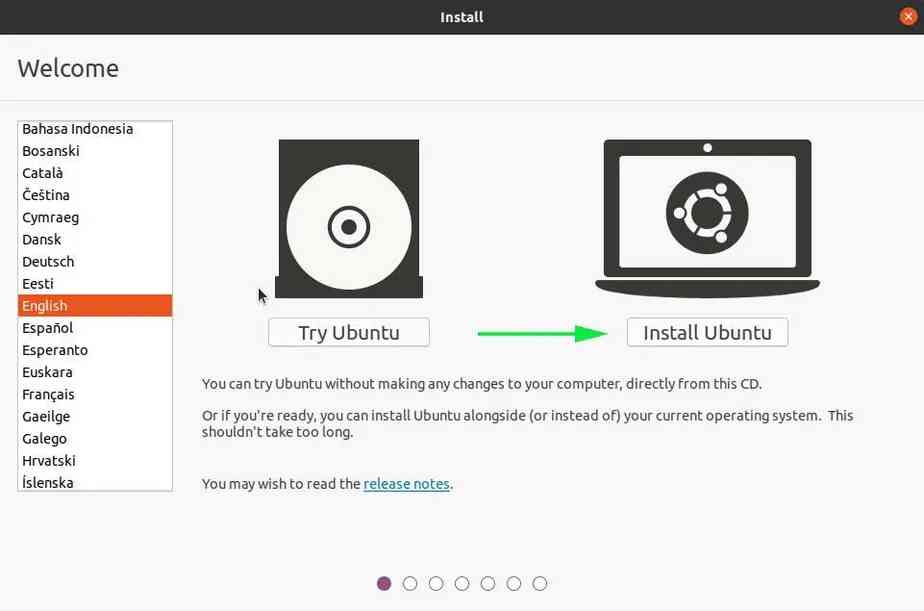
- Now, after the reboot, click on the Ubuntu option on the screen. After a few moments, the Welcome Wizard window will appear on the screen. Click on the Install Ubuntu option to move ahead.


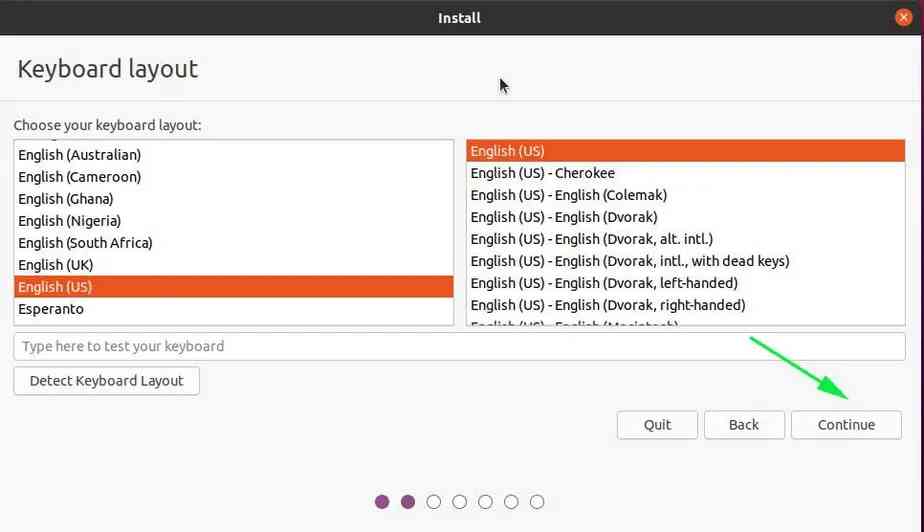
- Now, choose the suitable “Keyboard Layout” for your system and click on the Continue button. Now, connect your system with your Wi-fi so that they can download all the drivers’ updates and the system updates for Ubuntu.

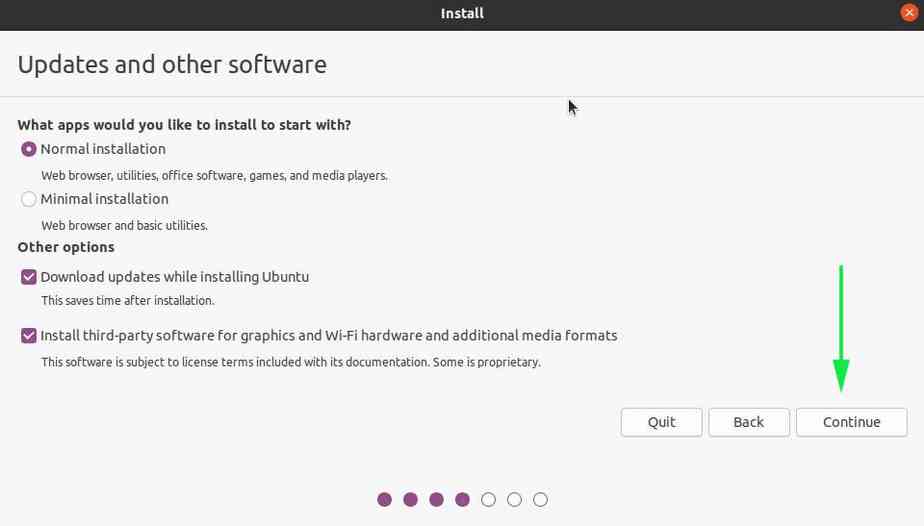
- Now, select the “Normal Installation” option and again click on the Continue button. Now, the system will ask you to choose the installation type with three options – Install Ubuntu with Windows 10, Erase Disk and Install Ubuntu, and Something else. Click on the Something Else option and again click on the Continue button.

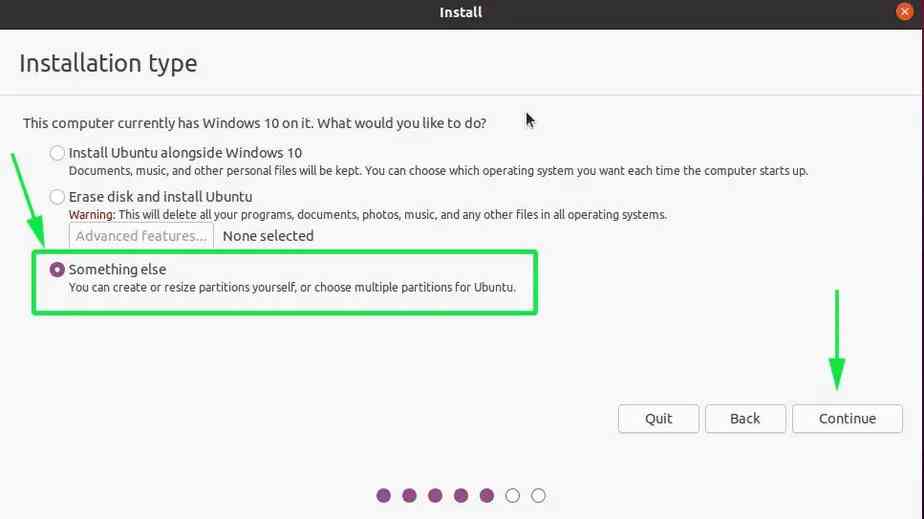
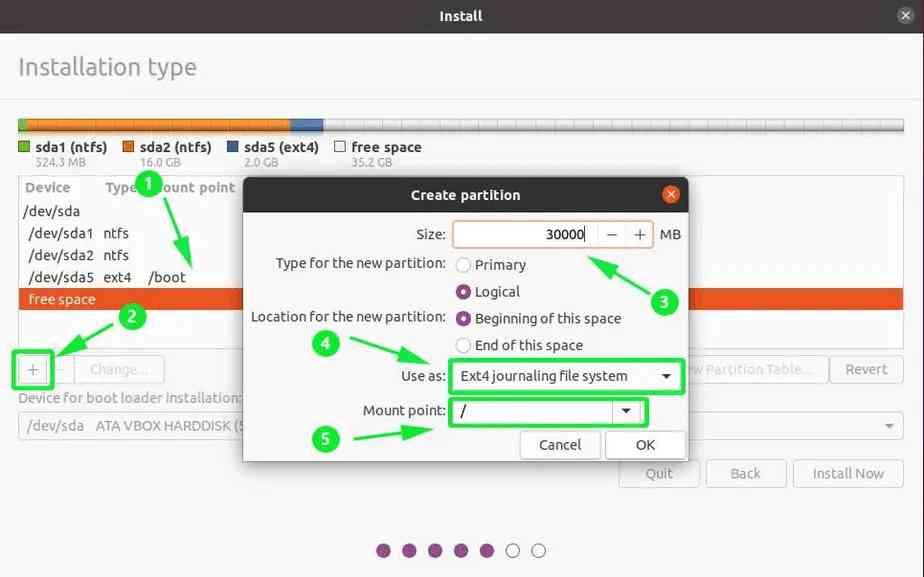
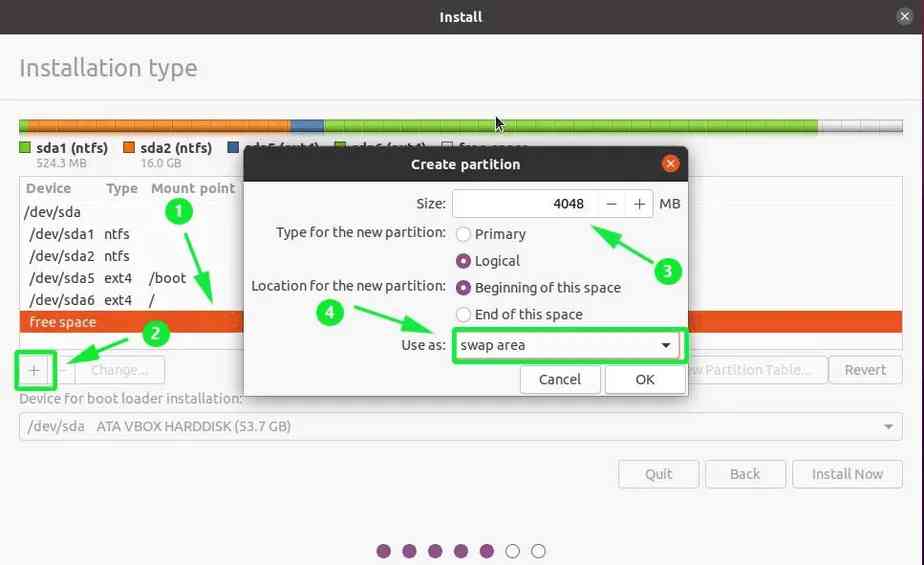
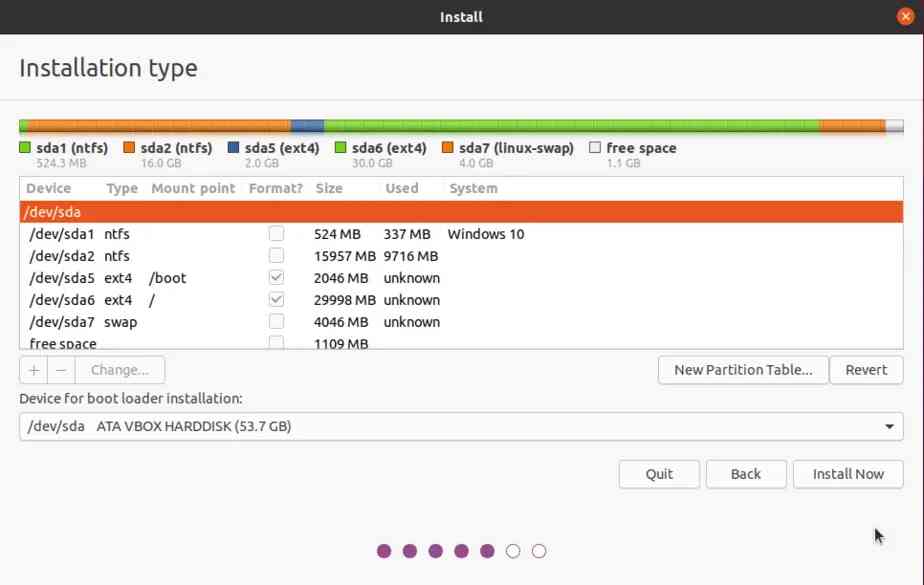
- Now, by clicking on the Something Else option, you’ve to allocate your disk memory to Ubuntu manually. Now, select the disk with free space and click on the ‘+’ button to add free space on the disk space to install Ubuntu. On the pop-up window, define the size of the boot partition, choose the ‘Ext4 Journaling file system’ option on the drop-down list, and again choose ‘/’ i.e. ‘root’ as the Mount Point. And, click on the OK button to move ahead.

- And, at last, to create the Swap Partition, all the steps were the same except there is a change where instead of the ‘Ext4 Journaling file system’ option, you’ve to choose the ‘Swap Area’ option on the drop-down list and again click on OK button.

- Once you’re completely satisfied with the disk partition, click on Install Now option.

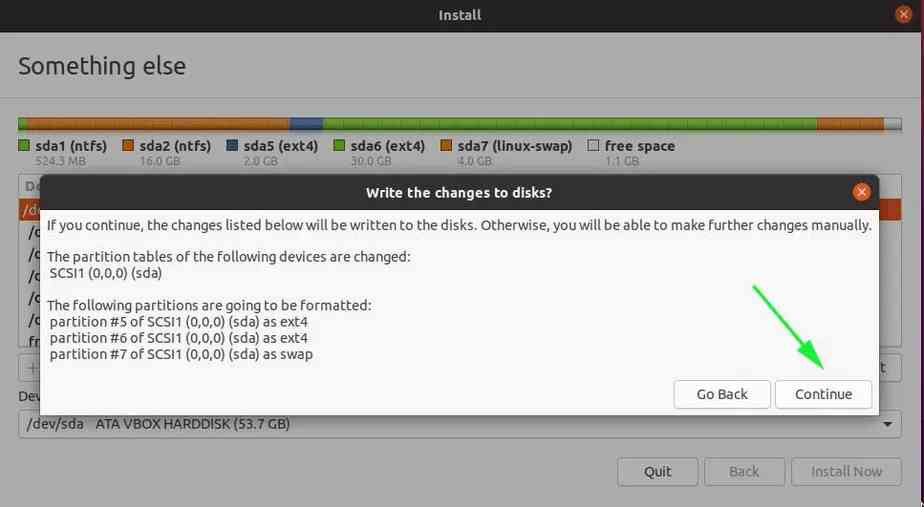
- A pop-up message will be displayed on the screen asking you to confirm all the changes which you’ve made to the disc. Click on the Continue option to proceed with the installation of Ubuntu.

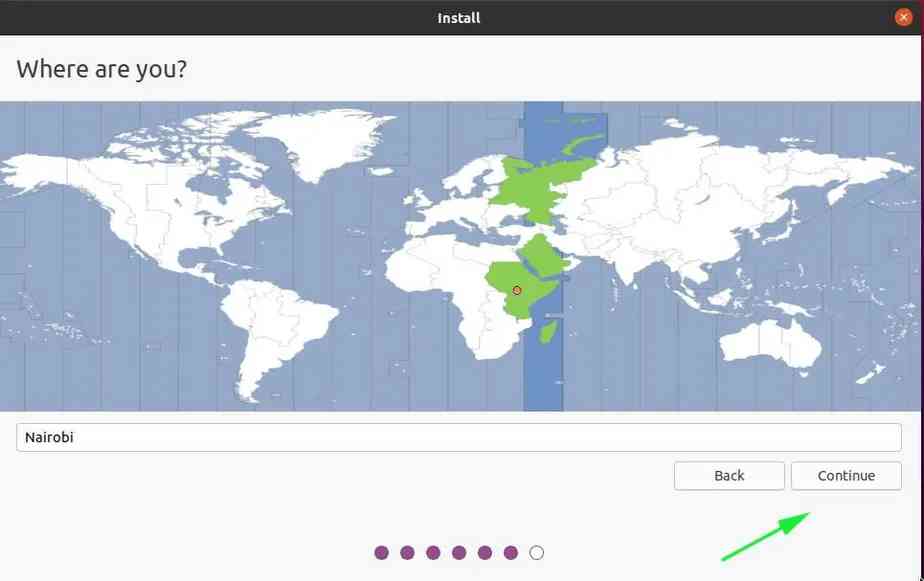
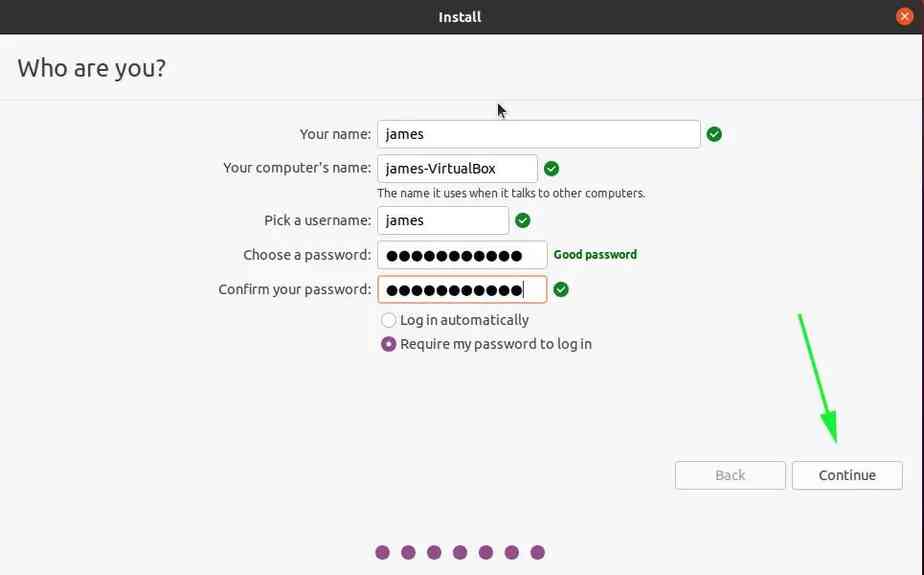
- Now, finally, you’ve to choose your preferred time zone like India and click on the Continue option. On the next step, enter your name, username, and password details, and again click on the Continue option.


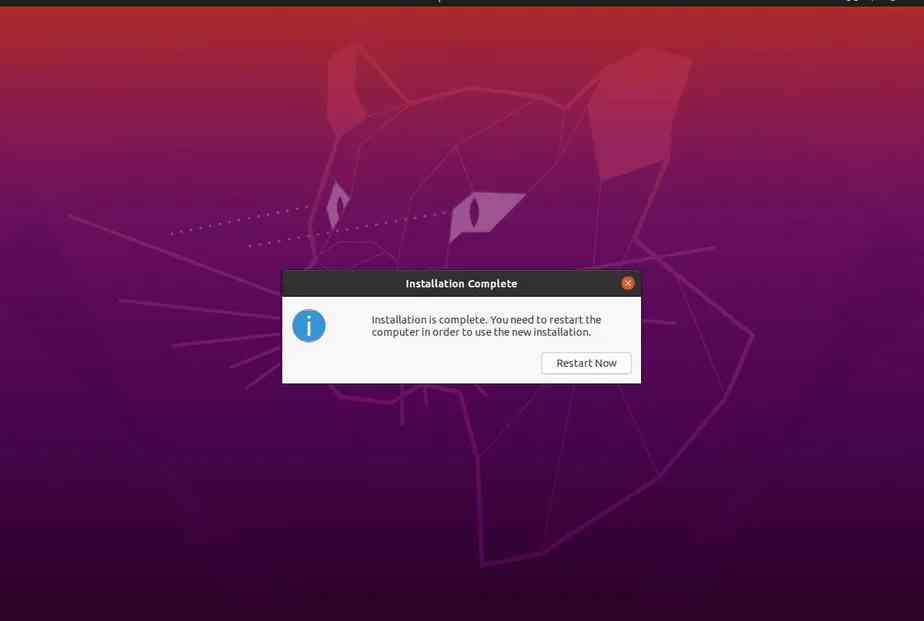
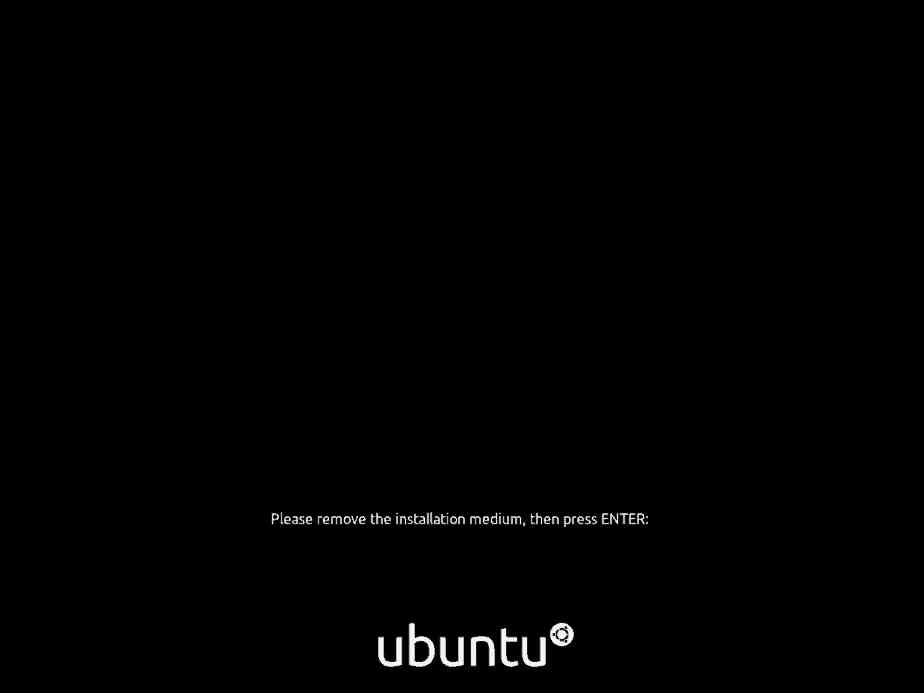
- After 15 to 20 minutes, the installation of Ubuntu OS in your system will be completed and when the installation process is complete, just click on Restart Now button and remove the bootable USB Drive from your system and press the Enter key

- Upon rebooting the system, you’ll get a bottom Grub bootloader screen with multiple options from which you can select to boot into Ubuntu or Windows Boot Manager. To boot into Ubuntu OS, choose the first option on the list.


- Now, enter the login details and you’re ready to use both Ubuntu and Windows 10 in a single PC system.
Author Bio:
Avery Hynes is a content strategist, SEO Professional, and Head of marketing at TheBestMonitors. He is passionate about growing business on the top of digital platforms.


