Android phones’ cameras have improved a lot. Their megapixels, anti-shake mode, and more features help Android users take photos handily with high quality. Thus, people prefer to take photos with their mobile phones than before.
But how can you protect your precious Android photos? Most people think their Windows PC is the best place to back up their photos. So, would you like to transfer photos from Android to Windows for backup and view them on the big screen? If so, let’s check these 4 approaches below, and select one to implement your photo migration.
Way 1: Import Photos from Android to Windows via Photos App
Have you used the Photos app on your Windows PC? This feature can help you import photos from a connected device via a USB cable. What’s more, it can manage your Android photos like your Android Gallery app. For example, you can create new albums to save your pictures by category. Additionally, it allows you to import all photos from a folder at once to save you time a lot.
How to copy photos from your Android phone to a Windows PC via the Photos app:
- Connect your Android smartphone to your PC via a USB cable, and choose the File Transfer option on Android.
- Click the magnifier icon in the taskbar, type Photos, and navigate to this app.
- Click the Import > From a connected device option, then choose the DCIM folder. Next, you can selectively transfer your Android pictures to Windows.

Tips: To import all the photos at a time, you can tap the Import > From a folder, and choose your DCIM folder. Finally, click Import items from this folder. After a while, you can directly view the photos on your PC.
Way 2: Transfer Photos from Android to Windows via Android Assistant
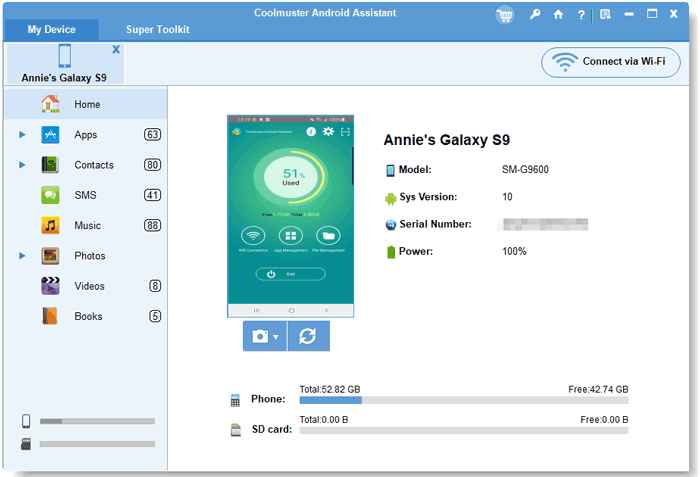
Want to transfer all photos from an Android device to Windows in 1 click? You can utilize Coolmuster Android Assistant. It can not only transfer photos fast, but also transmit and manage Android data without hassle, like contacts, SMS, apps, videos, music, documents, and more. If you want, you can move all types of Android files to your Windows computer at once.
Also, this software can work on the latest Windows 11 as well as Windows 10/9/8/7XP/Vista. Moreover, it supports most Android OSes, including Android 11/10/9/8/7/6/5/4. Hence, almost all Android phones and tablets are highly compatible with it.
One-click to export photos from Android to Windows PC via Coolmuster:
- Please download and install this software on your PC.
- Launch it and use a data cable to connect your Android handset to the PC. Then enable USB debugging on the mobile device.

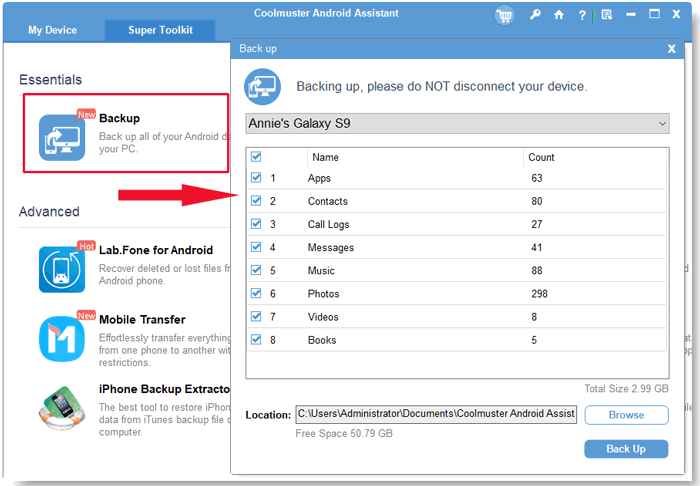
- Once connected, tap the Super Toolkit > Backup, and tick the Photos category. At last, hit the Back Up to begin the transferring procedure.

Note: If you would like to move several pictures to the PC, you can click the Photos icon at the left on the homepage. Then all your photos will be shown on the interface, and you can select and transfer them freely.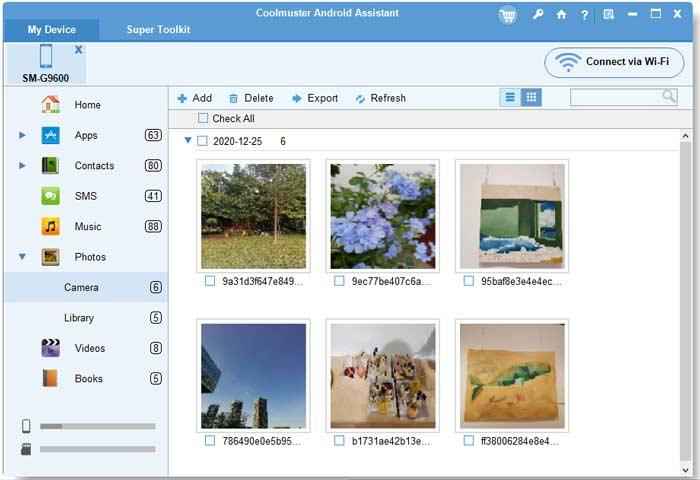
Way 3: Send Pictures from Android to Windows via Your Phone
Your Phone can help you access your mobile phone on a Windows PC wirelessly. Therefore, you can also use it to send your pictures from Android to the PC. But it requires a PC with Windows 10 updated after May 2019 and the Bluetooth feature.
How to send pictures from Android to Windows via Your Phone:
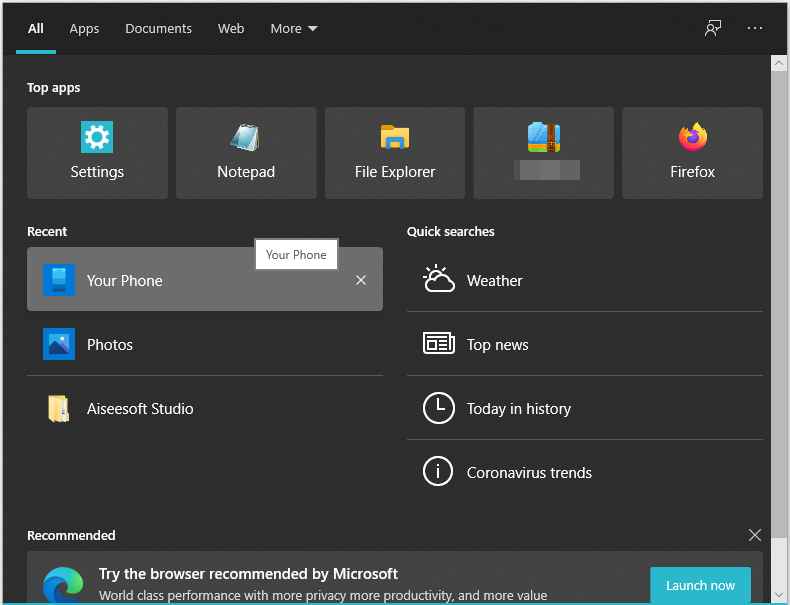
- Download and install Your Phone Companion on your Android phone. Then click the magnifier to type Your Phone and open it on the desktop.

- Enable Bluetooth on both devices, and choose Android > Continue to sign in with your Microsoft account. Then use your cellphone to scan the QR code on your PC for connection.
- Tap the Photos option, and select the images you want to save them to your computer.

Way 4: Sync Photos from Android to Windows via Google Photos
Google Photos allows you to access your uploaded photos and videos on any computer and mobile device. And you can visit and log in to Google Photos via the website instead of installing the software. However, an available network is needed for the upload and download.
How to download photos from Android to a Windows computer via Google Photos:
- Install Google Photos on your Android device, and sign in with your Google account.
- Open the app, tap the Menu icon on the top left, and hit Settings > Back up & Sync. Then enable this feature. It will sync your local photos to Google cloud storage automatically.
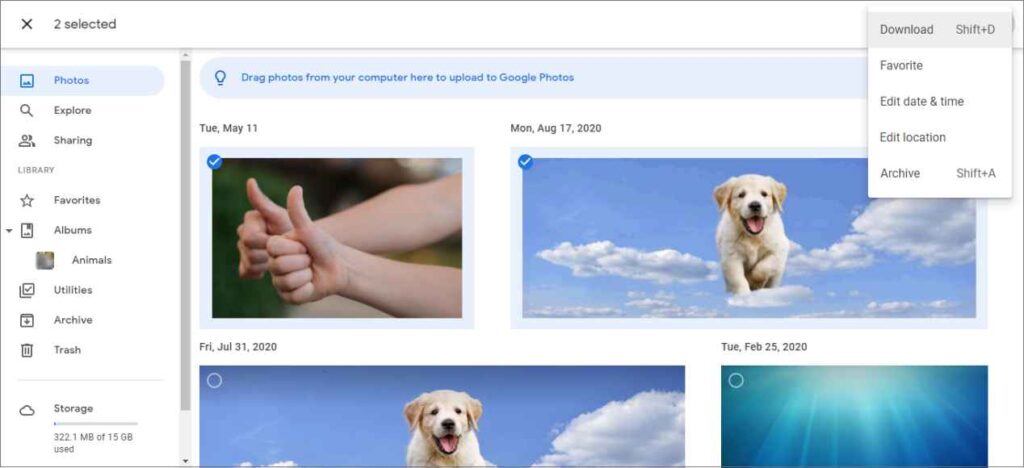
- Open the Google Photos web on the PC, and log in with the same account. Then select the desired pictures, and click the More > Download icons. Your Android photos will be stored on your Windows PC.

Conclusion
No matter what method you choose among previous parts, you will successfully transfer photos from Android to Windows. These ways have different characteristics, but all of them are easy to use. Anyway, please feel free to write down your queries when the going gets tough. We’ll be glad to help you out.


