 Due to its impressive speeds and coverage, Starlink, a satellite internet service from SpaceX, is gaining popularity around the world.
In some cases, however, users may be unsatisfied with the provided Starlink router and want to switch to a third-party router of their choice. That’s where bypassing the Starlink router comes in handy. It allows you to use your preferred router while still enjoying the benefits of Starlink’s high-speed internet.
In this article, we’ll walk you through the steps on how to bypass your Starlink router and configure a third-party router. By following our easy-to-follow guide, experiencing the best of both worlds won’t be a problem.
We’ll cover everything you need to know, from obtaining the necessary equipment to configuring your third-party router and enabling bypass mode on the Starlink router. You’ll be able to bypass the Starlink router like a pro with our guide, whether you’re a tech enthusiast or just looking for a way to improve your internet setup.
What Does Bypass Starlink Router Mean?
“Bypassing the Starlink router” permits you to connect directly to the Starlink satellite internet service without using the Starlink router. In this way, you can manage your network with a third-party router and potentially improve your internet speed and performance.
Bypassing the Starlink router is a configuration option provided by Starlink that can be accessed through the Starlink phone app or by using a hardwired connection to a PC after a factory reset.
Are you considering bypassing your Starlink router? Before you take the plunge, you might want to think twice, because once you do, you won’t be able to switch back without resetting the router to its default settings.
Bypassing the router can have both benefits and drawbacks. On one hand, it can give you more control over your network and the ability to use your own equipment. On the other hand, you may lose some of the advanced features and security that come with the Starlink router.
So, if you’re absolutely sure that you want to bypass Starlink wifi router, go ahead and follow the steps provided. Just keep in mind that you won’t be able to switch back without resetting the router to its default settings.
How to Bypass Starlink Router
Summarized
Connect your computer to the network using an ethernet cable. Once connected, access Starlink’s IP address via a web browser. The IP address for us was 192.168.100.1. This will bring up the Starlink app in a browser format which is much easier to navigate than the app itself.
Using the web interface, you can bypass the Starlink router and switch to your own router. Voila, your internet connection is up and running smoothly. In addition, you can also use this method to unstow the Starlink dish. Just remember to use the web interface instead of the app on your phone.
Starlink Router Bypass Mode Configuration
Are you tired of being limited by your Residential Starlink router? Do you want more control over your network’s routing and firewall options? Well. In this section, we’ll be diving into the world of Starlink Rourter Bypass Mode or Bridge Mode configuration for the Residential Starlink, using the example of OPNsense.
We understand that it can be frustrating when you’re unable to access certain features or settings on your router, especially when it comes to advanced networking configurations. That’s why we’re here to help you take control of your network and unlock its full potential.
Whether you’re an IT professional, network administrator, or simply a tech enthusiast, this guide will provide you with step-by-step instructions on how to configure your Residential Starlink in Bypass mode.
Requirements
Before we dive into the ins and outs of configuring Starlink for Bypass mode, let’s make sure you have everything you need. First off, you’ll need a Protectli Vault with OPNsense installed. Or you can have your trusty operating system of choice.
Next up, you’ll need to have the Starlink kit. This includes the dish and the router, along with the necessary service. If you don’t have the Starlink kit yet, make sure to get one before proceeding with the setup.
- First, make sure you have installed Starlink according to the manufacturer’s instructions and that it has a solid internet connection. Check that Starlink has an “Online” status.

- Then, grab an Ethernet cable and connect it to the RJ45 port on the Starlink power cable. The exact port may vary depending on the version of Starlink you have, so be sure to check the manual.
- Next, open up the Starlink app on your phone and go to the Settings menu.
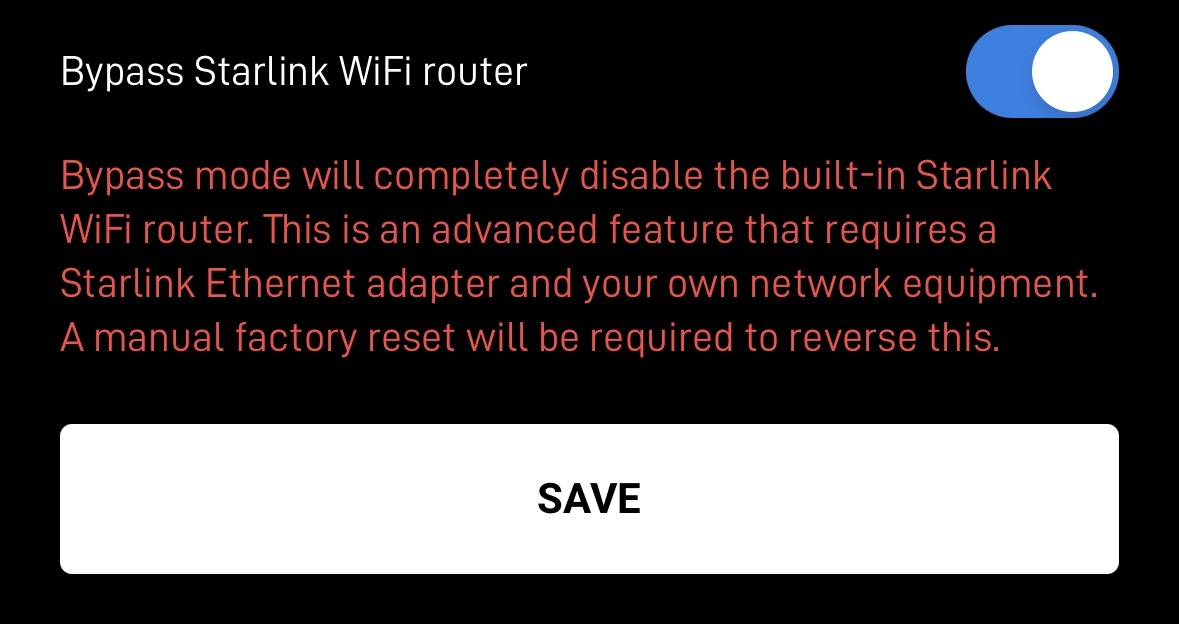
- Here, you’ll want to select “Bypass Starlink WiFi router.”


- Alternatively, you can achieve bypass mode by connecting your PC directly to Starlink after performing a factory reset.
- To do this, power cycle the Starlink three times, leaving 2-3 seconds between each cycle. Then, Go to http://dishy.starlink.com or 192.168.100.1 on your browser. Follow the on-screen instructions and you should be good to go.
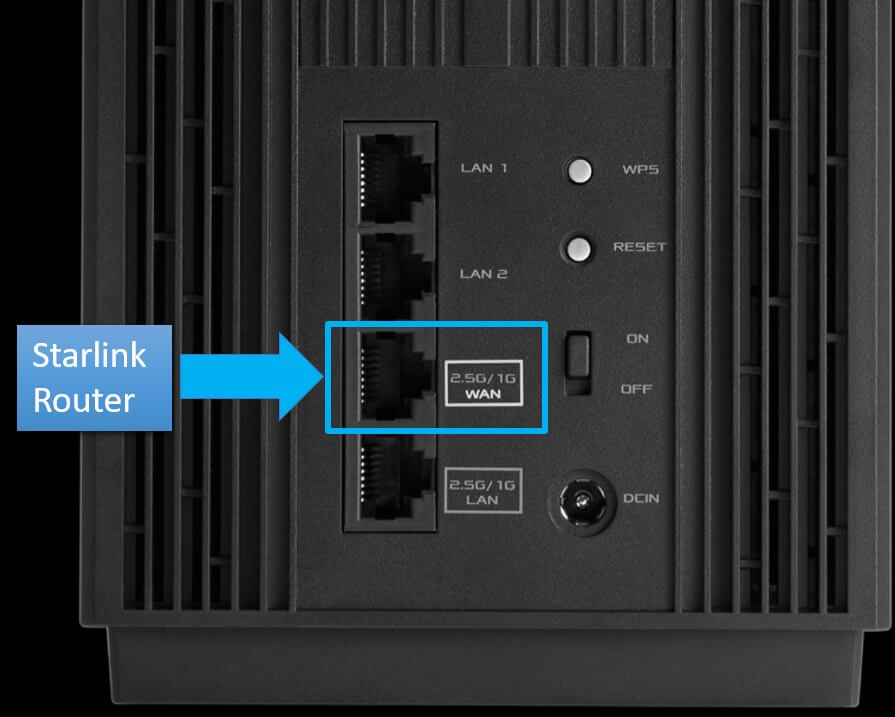
- Now, plug the other end of the cable into the OPNsense WAN port. Then, connect your PC to the OPNsense LAN port.
- Next, log in to the OPNsense webUI and make sure the dashboard is visible. Head over to the “Interfaces” widget and check whether the WAN interface is receiving the 100.x.x.x address. If not, disconnect the Ethernet cable from the OPNsense WAN port and reconnect it. As long as the address provided remains 192.168.100.x, connect the “WAN” Ethernet cable directly between the Starlink router and the PC.
- Head over to 192.168.100.1 and verify that the Starlink Web UI is displayed. Make sure that “Bypass Mode” is correctly enabled.

- Finally, reconfigure the Ethernet cables to ensure that the Starlink router is connected to the WAN port of OPNsense, and OPNsense’s LAN port is connected to the PC.
Starlink Bypass Router
Here’s a step-by-step guide on how to bypass the Starlink router and connect to a third-party router like a pro.
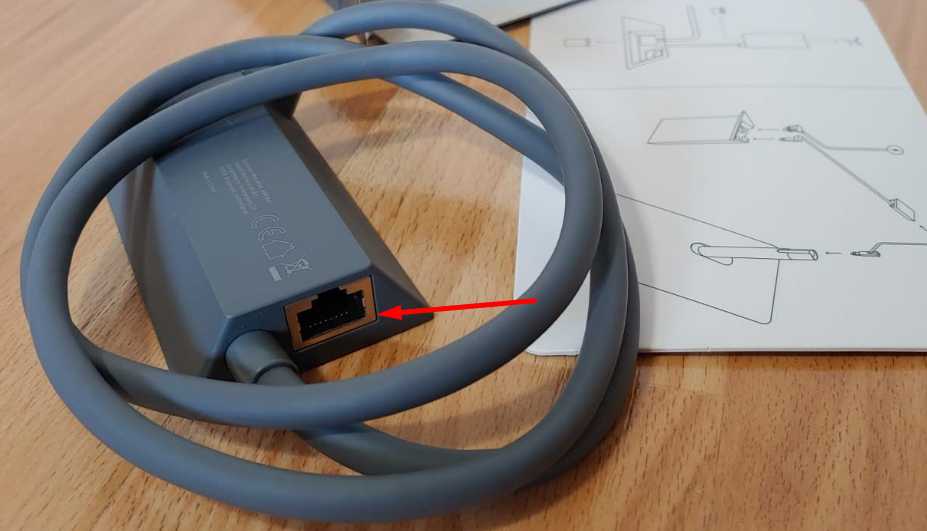
- To begin with, you’ll need a Starlink Ethernet adapter to connect your third-party router to the Starlink system. Once you have the adapter, it’s time to connect your third-party router to Starlink.
- Unplug the Starlink cable from the router and plug in the Ethernet adapter instead. Connect the Starlink cable to the Ethernet adapter and let the dish boot up for a few minutes. For connecting your third-party router to Starlink, use the Ethernet cable that came with it. In the Starlink Ethernet adapter, one end plugs into the WAN port, and the other plugs into the Internet port of your third-party router.

- Now it’s time to configure your third-party router. We’ll take an Asus router as an example, but the process may vary based on the manufacturer. Log in to router.asus.com and change the password and name of your router.
- Make sure that the WAN connection type is set to Automatic.

- When your third-party router is set up, connect it to the internet to see if it is connected. You’ll notice two Wi-Fi networks – the Starlink Wi-Fi and the Wi-Fi network from your third-party router. However, having two routers connected to one internet source means you have a 2 NAT configuration, which is not ideal. So, it’s time to enable bypass mode on the Starlink router.
- Access the Starlink app, connect to the original Starlink Wi-Fi, and go to WiFi settings.
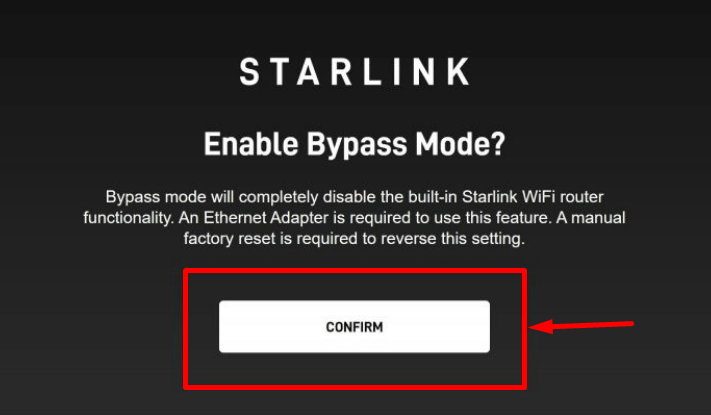
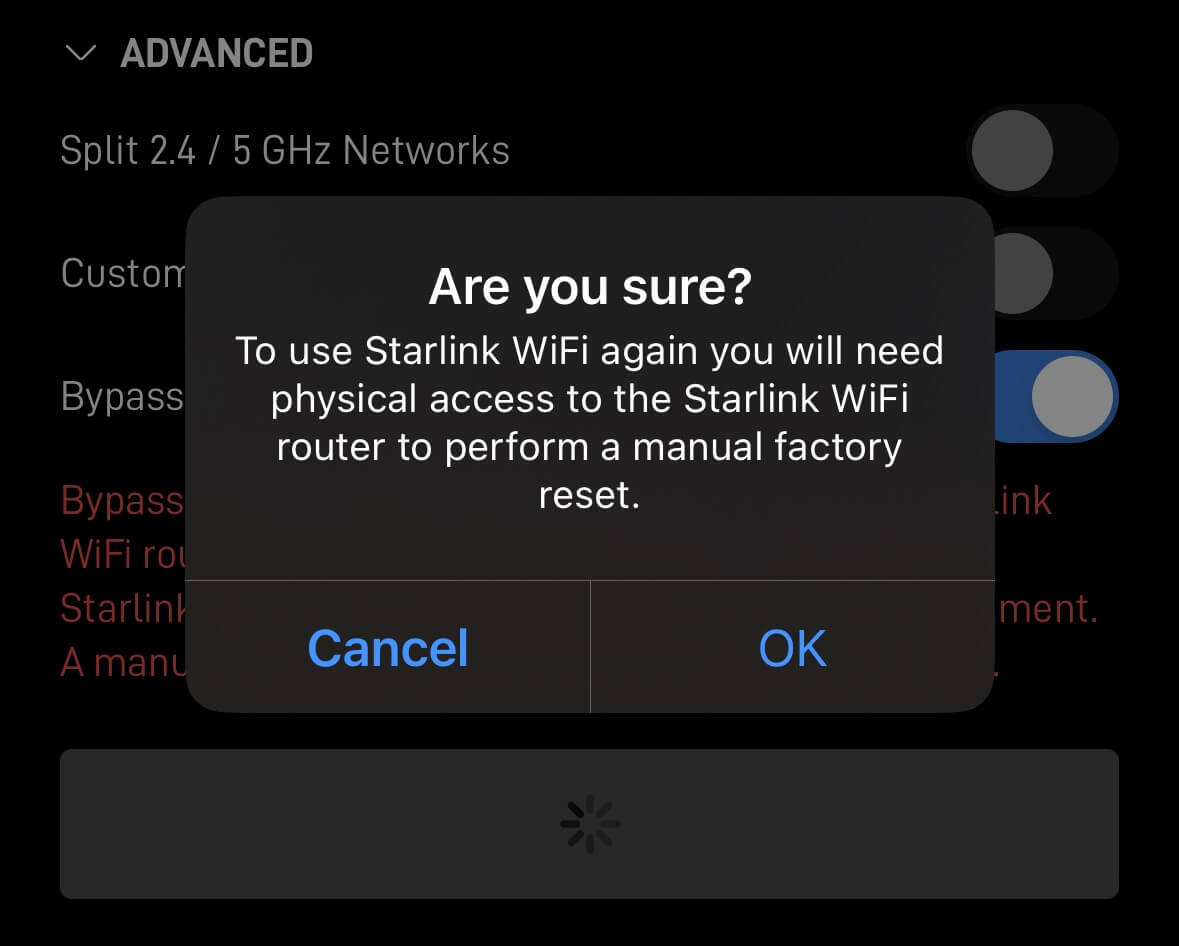
- Click on Advanced and toggle Bypass Mode.


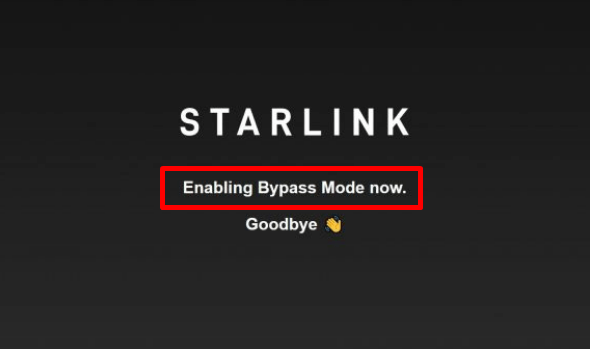
- Confirm your decision by pressing OK and voila!
 You’ve successfully bypassed the Starlink router and connected a third-party router to the same Starlink internet.
Bypassing Starlink Router Didn’t Help? Easy Solutions to Maximize Your Internet Speed
If you’re one of the many people who have bypassed their Starlink router to connect to a third-party router in hopes of improving their internet speed but haven’t seen any results, don’t fret! We’ve got some tips to help you improve your internet speed.
- Prior to anything else, don’t forget to reboot your router regularly. This simple step can work wonders and save you from the frustration of a dead internet connection.
- You can also consider installing an amplified and powered antenna alongside your router. This will help improve the quality of your internet connection and ensure better signal reception.
- If your router still uses outdated wireless protocols, it’s high time you turn them off. Outdated protocols are known to slow down internet speeds, so it’s best to stick with the latest and greatest.
- Another way to boost your internet speed is by shifting to a less crowded wireless channel bandwidth. Opt for the 5 GHz bandwidth, which tends to have less traffic and thus, a higher speed connection.
- Lastly, always remember to keep your router’s firmware up to date. This will ensure that you’re getting the most out of your internet connection and enjoying faster speeds.
So, if bypassing the router hasn’t solved your slow internet issue, give these tips a try. With a little bit of troubleshooting, it won’t take you long to get lightning-fast internet speeds!
RELATED GUIDES: –
- How to Stow Starlink (Easy & Complete Guide)
- How to Update Starlink Firmware (2023)
- How to Fix Starlink Disconnected Error (2023)
- How to Reboot Starlink Router (Quick & Easy Guide)
- How to Reset Starlink Router (Guide 2023)
That’s it folks, you’ve successfully learned how to bypass the Starlink router and use your preferred third-party router with Starlink internet service. With this process, you are not only able to enjoy the benefits of high-speed Starlink internet but can also use whichever router you choose to enhance performance.
Remember, you can always turn off bypass mode in the Starlink app if you want to use the Starlink router again.




 You’ve successfully bypassed the Starlink router and connected a third-party


