Steam is a big place where people go to buy games, download them, and play on their PC. You can chat with friends, play together online, and find loads of cool games to try out. Millions of gamers around the world use it every day. So when something goes wrong, like getting an error while trying to sign in, it can be super frustrating. One error that’s been bugging a lot of users lately is Steam error code e20. This one usually shows up with a message like “There was a problem communicating with Steam. Please try again later.”
This can stop you from logging into your account, playing your favorite games, or even just opening the Steam store. For some people, it shows up out of nowhere and ruins online matches or game sessions. Not fun at all.
So why does this happen? There are a few common reasons. In the rest of this guide, we’ll explain what this error is, why it happens, and share some easy methods to resolve the e20 error on Steam.
What is Error Code e20 on Steam?
Steam error code e20 is an issue that prevents users from logging into their accounts or accessing Steam features. It typically shows up with error messages like “There was a problem communicating with Steam. Please try again later,” or “Something went wrong while attempting to sign you in. Please try again later.” This problem can occur at any time, whether you’re logging in via the Steam client or a web browser.

The main causes of this error are often linked to internet connectivity issues, which prevent Steam from communicating with its servers. Less commonly, it can be due to server downtime on Steam’s end. In some cases, interference from firewall or antivirus software might block Steam’s access, further complicating the login process.
10 Quick Ways to Fix Steam Error Code e20
Disable Windows Firewall
Sometimes, Windows Firewall or antivirus software can mistakenly block Steam, causing error code e20. To see if this is the issue, you can temporarily disable the firewall and check if Steam works.
Temporarily Disable Windows Firewall
- Press the Windows key + R to open the Run dialog box.
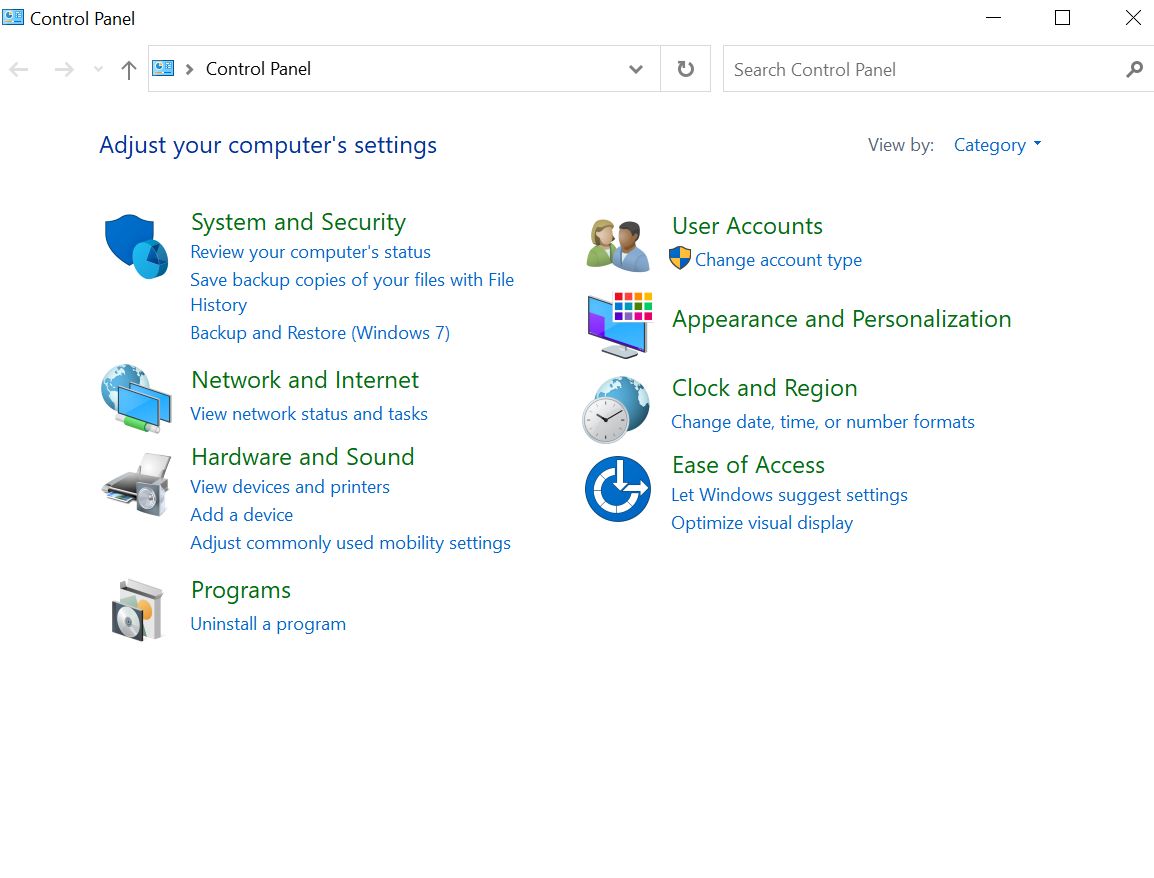
- Type control panel and hit Enter to open the Control Panel.
- Go to System and Security and click on Windows Defender Firewall.

- On the left-hand side, select Turn Windows Defender Firewall on or off.

- Turn off the firewall for both private and public networks by selecting Turn off Windows Defender Firewall under each section.

- Click OK to save changes.
- Now, try logging into Steam to see if the error is resolved. If it works, you’ll know the firewall was blocking Steam.


Add Steam as an Exception in Windows Firewall
Instead of keeping the firewall off, which isn’t safe, you can add Steam as an exception to allow it through the firewall:
- Open the Start menu and search for Firewall.
- Select Allow an app or feature through Windows Defender Firewall.

- In the new window, scroll through the list to find Steam. If it’s already listed, ensure both private and public boxes are checked.
- If Steam isn’t listed, click Allow another app at the bottom.
- Use the Browse button to locate Steam’s executable file (usually found in C:\Program Files (x86)\Steam\Steam.exe).
- Select it, click Add, and make sure both private and public boxes are checked.
- Click OK to save changes.

After adding Steam as an exception, turn your firewall back on by reversing the earlier steps and selecting Turn on Windows Defender Firewall for both private and public networks. Then try logging into Steam again.
Verify your Internet Connection
One of the most common reasons for Steam error code e20 is a problem with your internet connection. If your network doesn’t work properly, Steam can’t verify your login details, which leads to this error. Thankfully, this is usually easy to spot since you’ll notice other apps or websites failing to load as well.
To confirm if your internet is the issue, open a web browser and try visiting any website. If the page doesn’t load, your connection is likely down. Here’s what you can do to fix it:
- Restart Your Router: Turn off your router, wait for about 30 seconds, and then turn it back on to fix any ongoing minor connectivity issues.
- Check Network Cables: If you’re using a wired connection, make sure all cables are securely plugged in.
- Reconnect to Wi-Fi: Disconnect from your Wi-Fi network and reconnect to refresh the connection.
- Run Troubleshooter: On Windows, you can use the built-in troubleshooter by navigating to Windows Settings > Network & Internet > Status > Network Troubleshooter.
- Reset Network Adapter: If nothing else works, you can reset your network adapter settings. Open the Command Prompt, type netsh winsock reset, and press Enter.
Check for Packet Loss
Packet loss happens when data packets traveling over your network fail to reach their destination, and this can sometimes lead to errors like this. Checking for packet loss is a useful step to diagnose connectivity issues, and you can easily do it using the Windows Command Prompt.
- Press the Windows key + R on your keyboard to open the Run box. Then type cmd and hit Enter to open the Command Prompt.
- You can also just search for Command Prompt in the Start menu and open it from there — whatever’s easier.
- Once it’s open, type this command: ping google.com -n 50 and press Enter.


The command will send 50 packets to Google’s servers and display the results, including any packet loss. If you see messages like “Request Timed Out” or a percentage of packet loss in the results, it means your connection isn’t stable.
If you’re dealing with packet loss, try using an Ethernet cable instead of Wi-Fi — it gives a much steadier connection. Sometimes, just restarting your router can clear things up too. But if the problem keeps happening, you need to call your internet provider. The issue might be on their side, and they can check it.
Enable/Disable VPN
Sometimes, Steam error code e20 happens because Steam has restricted your computer’s IP address. This can occur if the platform detects unusual or spammy activity from your IP. If this is the case, using a VPN (Virtual Private Network) can help you bypass the restriction by giving you a new IP address. A VPN essentially masks your original IP and lets you connect to Steam through a different one.
If you’re not already using a VPN, this is a good time to try it out. Download a free or paid VPN app, connect to a server in another location, and then try logging into Steam again. If the error disappears, it’s likely that your original IP address was flagged by Steam.
On the other hand, if you’re already using a VPN and still facing the error, your VPN’s IP address might be blocked by Steam. In this case, try turning off your VPN completely and logging into Steam without it. If that works, then your VPN was the problem.
Alternatively, you can change your location within the VPN app or switch to a different VPN service that isn’t restricted by Steam.
Run Steam as Administrator and Try Compatibility Mode
Sometimes, giving Steam extra permissions or running it in compatibility mode can help fix error code e20.
- Right-click on the Steam shortcut on your desktop and choose Properties.
- Now go to the Compatibility tab.
- Check the box that says Run this program as an administrator
- Also, check the box for Run this program in compatibility mode and pick a Windows version from the list (like Windows 8 or 7).
- Once you’re done, click OK to save everything.
- Then try opening Steam again and see if the error is gone.
RELATED GUIDES: – Fix Steam “An Error Occurred While Setting Account Details”
Flush the DNS
Flushing your DNS clears old data and creates a completely new setup, which can fix network issues on your Windows OS.
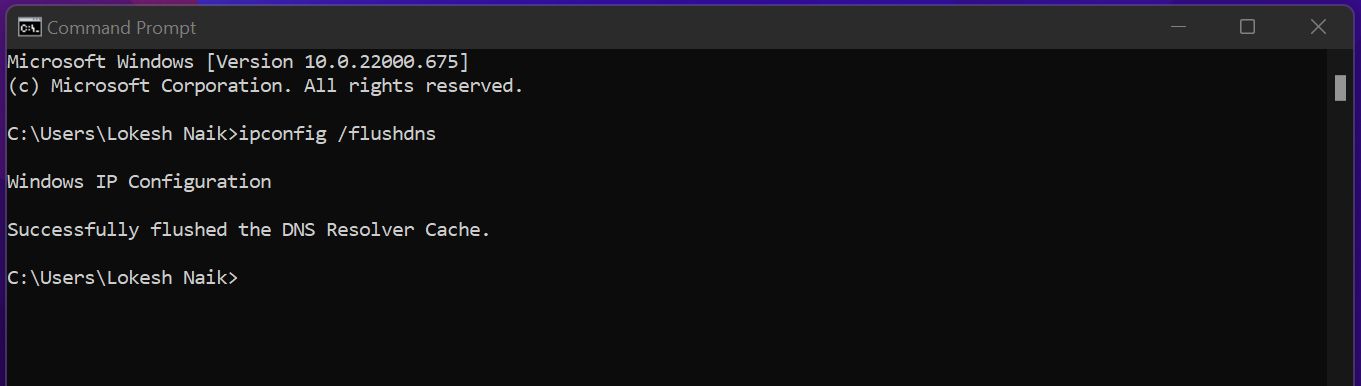
- To do this, open Command Prompt. You can search for it or open it directly. Right-click on it and select “Run as administrator” (Alternatively, press the Windows key + S, type “cmd” in the search bar, then right-click and choose “Run as administrator”)
- In the Command Prompt window, type the command ipconfig /flushdns and press the Enter key.

- Once the process is complete, you’ll see a message saying, “Successfully flushed the DNS Resolver Cache.”
- Close Command Prompt and relaunch Steam to check if the error is resolved.
Verify the Integrity of Game Files
If you think error code e20 might be showing up because some game files are broken or missing, you can try verifying your game files. This basically checks your game files and replaces any that are damaged or incomplete.
- To do it, launch the Steam client on your PC and go to the Library tab.
- Right-click on the game that’s causing issues and select Properties from the drop-down menu.
- Now, navigate to the Installed Files tab.
- Click on the Verify Integrity of Game Files button. Steam will begin checking all your game files for errors.
- The process might take a few minutes, depending on the size of the game. Once it’s done, Steam will automatically download and replace any missing or corrupted files.
After completing these steps, restart Steam and try launching the game again.
Clear Steam Cache and Temp Files
Sometimes, error code e20 can pop up because of a messed-up Steam cache. Resetting it might help clear things up.
- First, make sure Steam is completely closed (check your system tray too).
- Press Windows key + R to open the Run box.
- Type this command: steam://flushconfig and hit Enter.
- A small Steam window will pop up — just follow the steps to finish the reset.
Now, let’s also clear out your PC’s temporary files, just to be safe:
- Press Windows key + R again, type %temp%, and hit Enter.
- In the folder that opens, press Ctrl + A to select everything, then hit the Delete key.
Do the same again:
- Open Run, type temp, and press Enter.
- Select all the files and delete them too.
Change Steam Server Region
Sometimes switching your Steam server region can help fix error code e20. Take a look at how you can try it:
- Open Steam, click on Steam in the top-left corner, then go to Settings > Downloads.
- Under Download Region, pick a different server from the list.
- After that, restart Steam and see if the error is gone.
Reinstall Steam
If nothing else works, reinstalling Steam might do the trick.
- Open Windows Settings, then go to Apps & Features
- Select Steam from the list of apps, and click Uninstall.
- After that, press Win + R, type appdata, and hit Enter. Go into the Local folder and delete the Steam folder.
- Then head over to the Steam website, download the installer, and set it up again.
If none of the above methods worked, you should contact Steam support. If you have any questions or other solutions regarding this common Steam error, drop them in the comments section.


