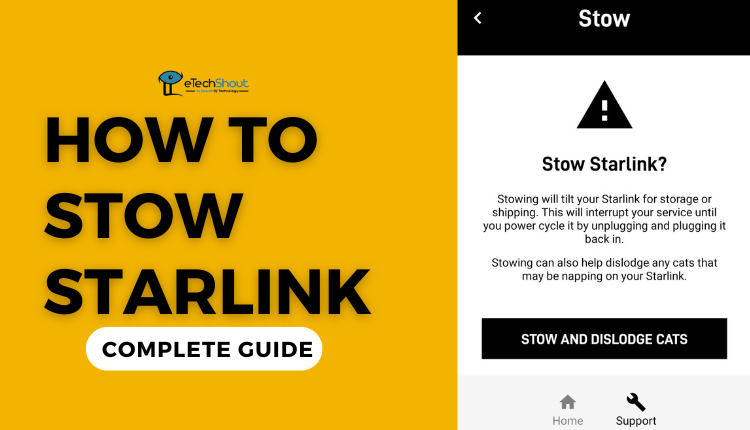
Do you use Starlink? Would you like to know how to stow your Starlink equipment when it’s not in use? Look no further! In this article, we will discuss everything you need to know about manually stowing your Starlink.
We will provide you with a step-by-step guide on how to stow Starlink dish. In addition, we will discuss some best practices for securing and storing your equipment.
Do you ever wonder what to do with your Starlink dish when you want to move it or send it back to Starlink for troubleshooting? No worries, Starlink’s ‘stow‘ feature has your back!
Starlink’s stow function allows the dish to be moved back to its default orientation, making it easier to pack up and transport to a new location.
Let’s say you’re moving to a new home, and you need to relocate your Starlink equipment. Instead of disassembling everything, the ‘stow‘ feature enables you to move the dish to a default orientation, simplifying packing and transportation.
No matter why you choose to stow your Starlink dish, you can do so in a variety of ways. This tutorial covers each method, so you’ll be equipped with the knowledge to stow your Starlink dish like a pro, whatever the situation.
How to Stow Starlink with App
The Starlink app makes it easy to stow your Starlink dish. As long as your Starlink is functional and you can connect to it, you should be good to go.
- Firstly, make sure you’ve downloaded the Starlink app on your phone. If you haven’t already, head to your Google Play Store or iOS app store and get it downloaded.
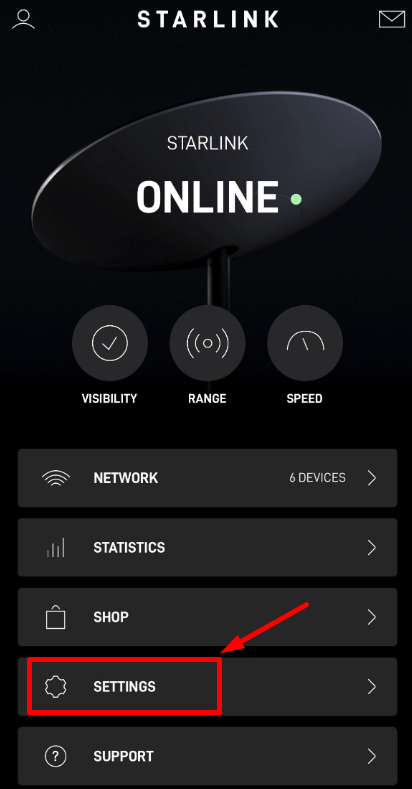
- Next, navigate to the ‘Settings‘ section of the app. You can find it by looking for the gear icon.

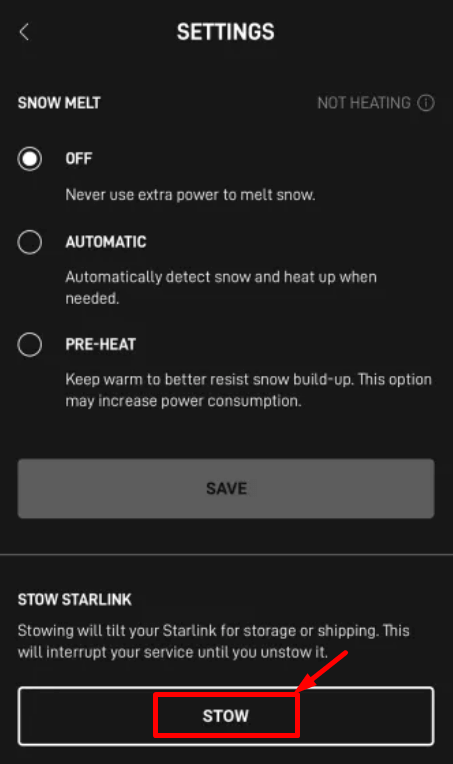
- When you’re in the settings menu, scroll down until you see the ‘Stow’ option.

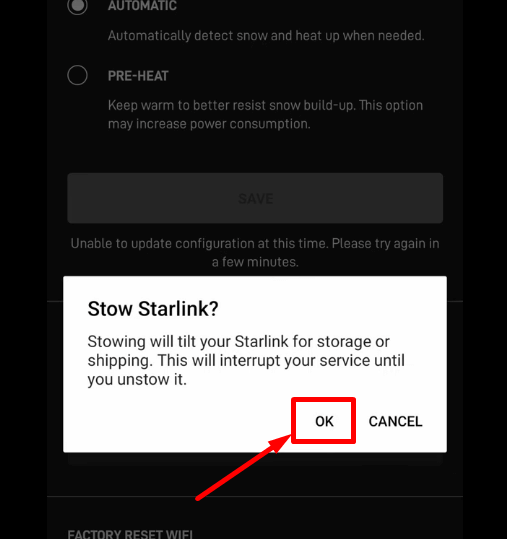
- Simply tap ‘Stow‘ and then confirm your selection by tapping ‘OK.’

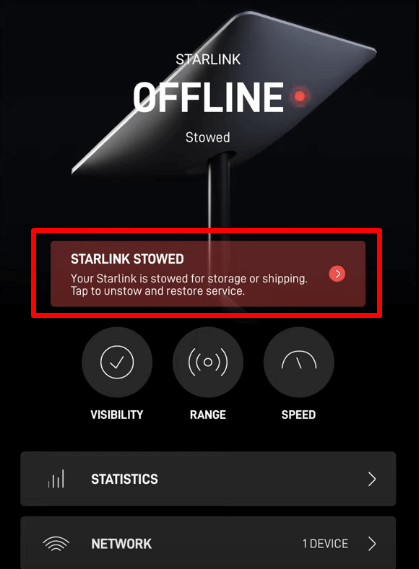
- That’s it! Your dish will automatically move to the stow position.

- So, no need to worry about getting your hands dirty or fiddling around with the dish. With the Starlink app, stowing your dish is just a few taps away.
In the case that you are remotely connected to your Starlink system and trying to stow your dish using the app, you’ll be prompted with an additional confirmation question.
If you’re absolutely sure that you want to stow the dish, simply tap ‘OK‘ to proceed. Remember, however, that you cannot un-stow and restore internet service if the dish is stowed remotely.
When you stow your Starlink dish, your internet service will be temporarily interrupted. Don’t worry, though – your router and Wifi network will still be on. You just won’t be able to access the internet until you un-stow the dish.
To un-stow the dish and restore your service, just follow the same steps you used to stow it. This time, instead of tapping ‘Stow,’ you’ll see an option to ‘Unstow‘ in the Settings section of the app.
But, if you’re remotely connected with the app, you won’t be able to see the un-stow option. You’ll need to be locally connected to Starlink in order to restore service. And, keep in mind that it can take several minutes for Starlink to boot first time after you un-stow the dish.
In other words, if you are in a rush to get online, you will need to plan accordingly.
How to Stow Starlink without App
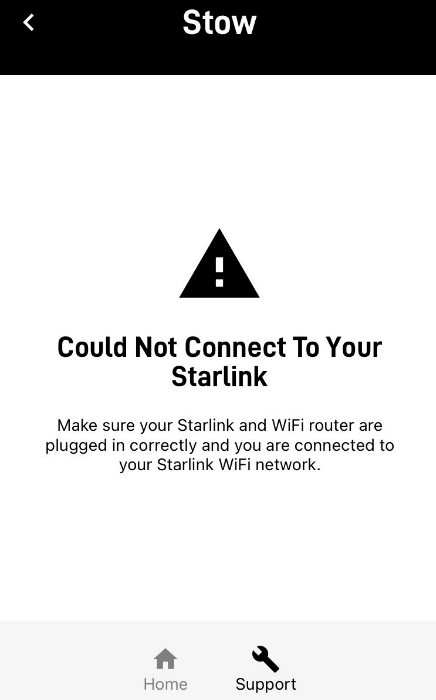 You don’t need to worry if you can’t access the Starlink app, you can still stow the dish with another method! You can do it this way:
- Make sure the dish is turned on and plugged in, then remove it from the mounting base
- Place the dish face down on a flat surface
- Wait about a minute, and the dish will automatically stow itself
- Quickly unplug the dish (either the Starlink cable or router power cable) to keep it stowed
When a dish has been stowed using this method, place it back in the mount and power it up. It will take a few minutes for the Starlink dish to start searching for satellites and orienting itself. Simple as that!
How to Manually Stow Starlink
I guess you’re in a bit of a tight spot. You have a broken Starlink dish that won’t stow properly. But don’t worry, we’re here for you. You can take the following steps:
- First, unplug the Starlink cable and remove the dish from the mount. Before you start messing around, disconnect everything.
- Next, lay the dish face down on a flat surface.
- Gently push down on the top part of the dish, and slowly push it down into the stow position.
- There you go! It has now been stowed and is ready for shipping back to Starlink to be repaired or replaced.
Note: – It is perfectly normal to hear a few clicks and grinds when stowing your Starlink dish manually. I know it might sound scary, but don’t worry – it’s just the electric motor and gears doing their thing.
RELATED GUIDES: –
- How to Fix Starlink Disconnected Error (2023)
- How to Update Starlink Firmware (2023)
- How to Reboot Starlink Router (Quick & Easy Guide)
- How to Reset Starlink Router (Guide 2023)
Well, folks, we’ve covered three different ways to stow your Starlink dish, and hopefully, one of them will work for you. And, if you’re still feeling stuck on stowing Starlink or unsure about something, comment below. Let us know if you have any issues and we’ll help you find a solution.

