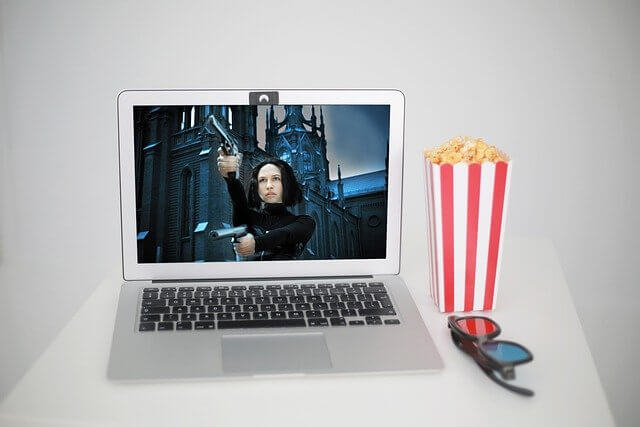
Netflix has been around for years, and people still love using it. Even with so many other streaming apps out there, Netflix keeps growing and reaching new countries. From the early days until now, it has built a huge user base. People enjoy opening the app, picking a movie or show, and relaxing after a long day.
However, no matter how popular or advanced an app is, errors and technical issues can spoil your mood. tvq-pb-101 is one such error on Netflix. You press play, and instead of your show, you see a message saying, “There’s an issue with your streaming device.”
If this error has shown up on your screen, you probably just want a quick fix so you can continue watching. In the sections below, I am going to share how we dealt with this issue, and I will also point out a few fixes that are really worth trying on devices like PlayStation, Roku, Xbox 360, and Smart TVs.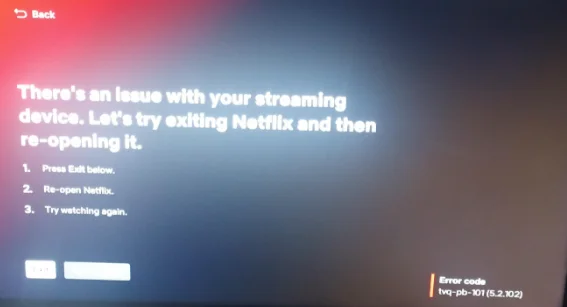
9 Easy Ways to Fix Netflix tvq-pb-101 on Any Device
Change Chromecast Audio to Auto
If you are using Chromecast and seeing the tvq-pb-101 error, the issue may be linked to your audio settings. In my case, the audio option was set to manual, and that was causing the problem.
To fix it, go to your Chromecast Audio settings and change the option from manual to auto. It might fix the issue for you, too.
Disconnect USB or Bluetooth Audio Devices
In many cases, the tvq-pb-101 error on Netflix is linked to external audio devices. The issue often appears with titles that use 5.1 surround sound or Atmos audio.
So, try disconnecting any USB audio interfaces, USB headphone dongles, or wireless USB adapters connected to your TV.
If you are using Bluetooth headphones or a Bluetooth sound bar, unpair them and test Netflix again. You can also switch your sound bar connection from Bluetooth to HDMI ARC or use an optical cable instead.
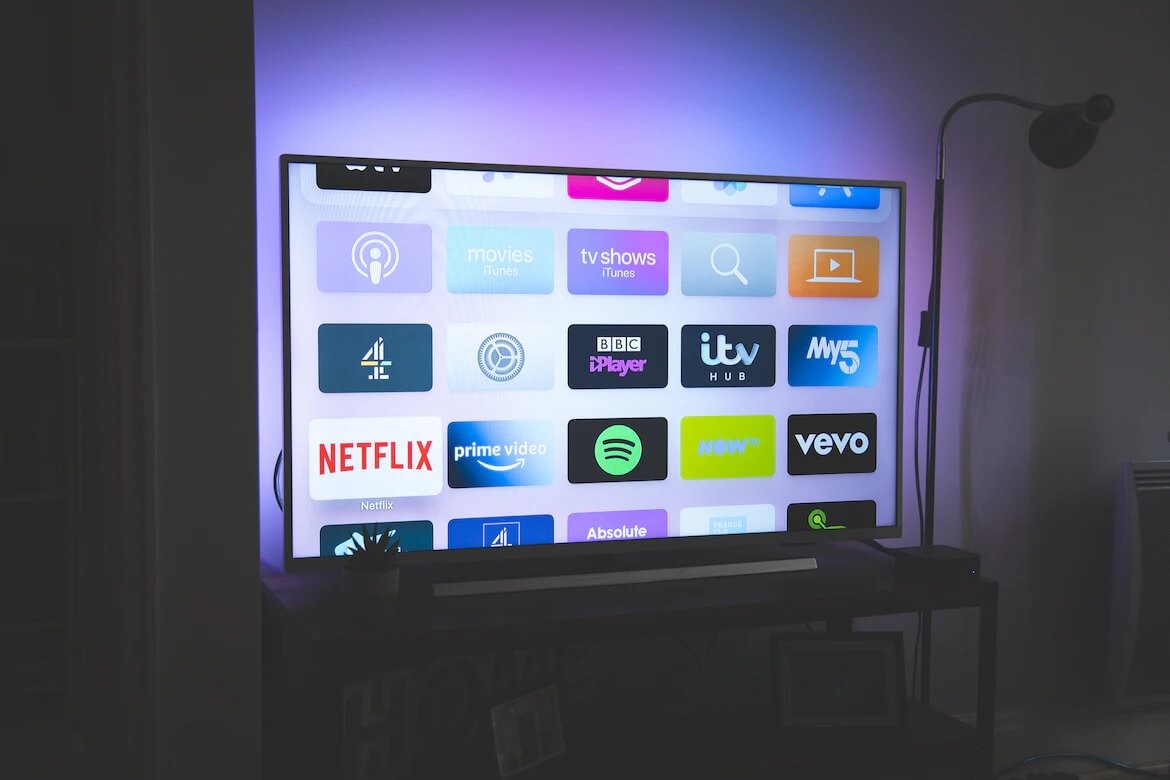
Change Digital Audio Output to Auto on Google TV
If you are using Google TV and Netflix keeps showing the tvq-pb-101 error, check your sound settings. In many cases, the problem is due to the audio codec setting, mainly when playing 4K or HD content.
- Open Settings on your Google TV.
- Go to Display and Sound, then tap on Sound.
- After that, open Advanced Settings and select Digital Audio Out.
- Now, change it to Auto. (Do not choose Passthrough, PCM, or any other option.)
- When the TV locks Netflix into a specific audio format, playback may fail.
- After making this change, restart your TV.
Note: Do not skip the restart. The new setting may not apply until the TV reboots.
Restart your Device
Another simple fix you can try is doing a full power cycle of your device. This is more than just turning it off with the remote. You need to completely shut it down using the power button on the device itself.
Once it is off, unplug the main power cable from the wall. After that, press and hold the power button for a few minutes. Leave it unplugged for about five minutes before connecting everything back. Plug the power cord in again and turn the device on to check Netflix again.
Sign Out of Netflix and Sign In Again
If you have been logged in to Netflix for a long time, try signing out of your account and then signing back in.
Make sure you remember your login details before signing out. If you are using Netflix on a TV or streaming device, entering your email and password again may take a few minutes, but it is worth trying.
Check Your Internet Connection
A slow or restricted internet connection can also trigger the Netflix errors. As a streaming service, it requires consistent bandwidth to stream HD and 4K content without interruption.
If you are connected to a public network such as one in a hotel, school, or office, check with the administrator to confirm that streaming services are not blocked. Many shared networks limit access to video platforms to manage traffic.
For home users, test your internet speed and compare it with Netflix’s recommended requirements for streaming. If the speed is below the required level, contact your internet service provider for assistance.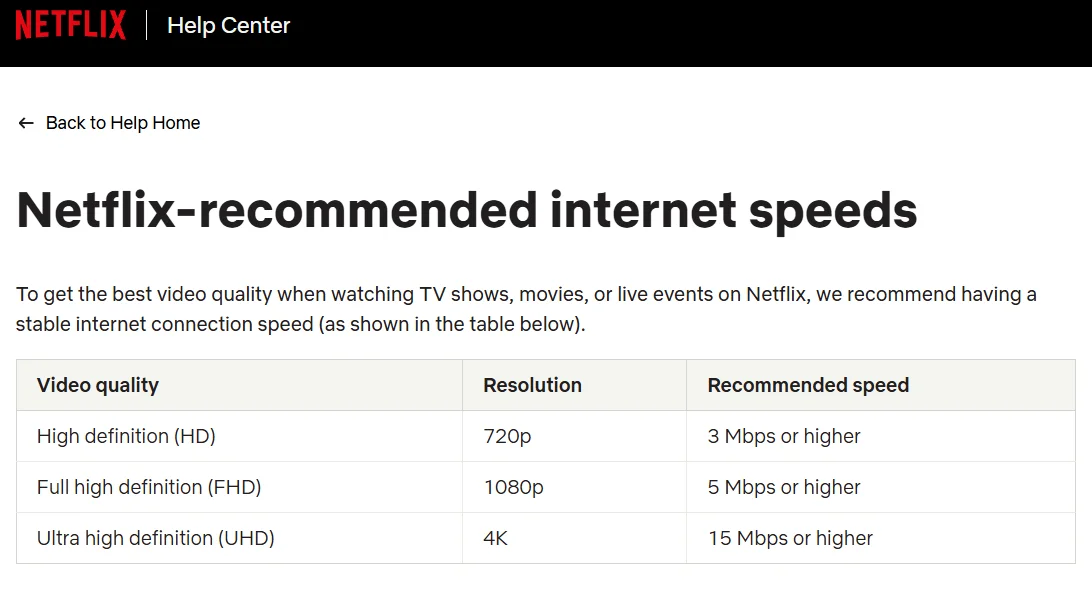
Update or Reinstall the Netflix App
If the error still shows up, the Netflix app itself could be the reason. An outdated version might be missing some new features or have a bug that can stop certain titles from playing. In this case, updating or reinstalling the app is worth trying.
You can check for updates directly in the app store on your device. However, reinstalling the app is often more effective. When you remove the app and install it again, your device downloads a fresh copy.
To do this on a smart TV, press the Home button on your remote and open Settings. Go to the Google Play Store and search for Netflix. Select the app and choose Uninstall. Once it is removed, restart your TV. Then open the Play Store again, download Netflix, and install it. After the installation is complete, restart the TV one more time and test Netflix again.
Check Netflix Server Status
Occasionally, Netflix servers can be down, which can stop titles from playing on all devices. The good part is that Netflix has its own service status page. You do not have to depend on third-party tracking sites to see if the platform is down. Just visit the official Netflix status page and check if there is any reported outage.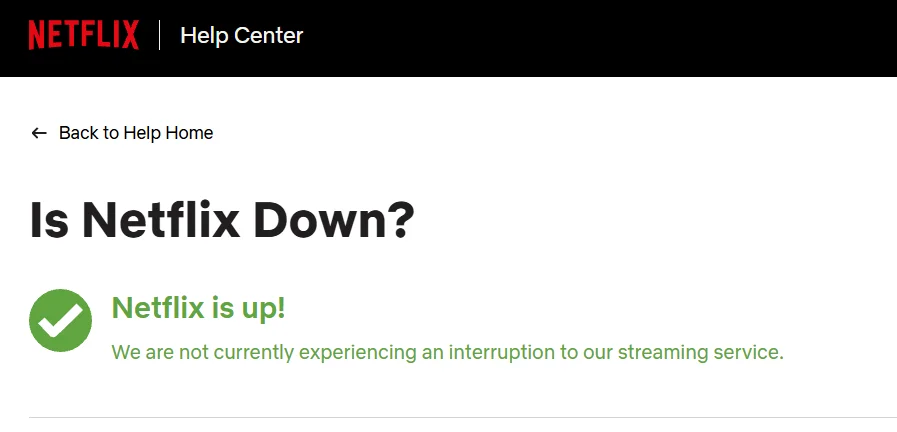
If the servers are down, there is nothing you need to fix on your device. You will need to wait until Netflix restores the service.
Try Using Another Netflix Profile
Another simple workaround is to switch to a different Netflix profile on the same account. In some cases, the issue is linked to the current profile that is logged in on your device.
Sign out of the current profile or switch to another profile from the profile selection screen. Then try playing the same title again. If it works on the other profile, the problem may be tied to the original profile settings or saved data.
If that happens, you can continue using the working profile or consider resetting the affected profile settings.
Hope this guide helped you fix the tvq-pb-101 error on Netflix. If it worked for you, feel free to share it with others. Also, let us know if you found any other workaround that helped.


